Team:Heidelberg/Human Practice/Open Day
From 2008.igem.org
Annastoeckl (Talk | contribs) (→Feed-Back by the Pupils) |
Annastoeckl (Talk | contribs) (→Feed-Back by the Pupils) |
||
| Line 517: | Line 517: | ||
| "The students answered all our questions in a very understandable way" | | "The students answered all our questions in a very understandable way" | ||
|- | |- | ||
| + | | | ||
|"I was very impressed by the microscopes, I only knew them from television!" | |"I was very impressed by the microscopes, I only knew them from television!" | ||
|- | |- | ||
Revision as of 18:01, 28 October 2008


Open Day - "Learning by doing was great"
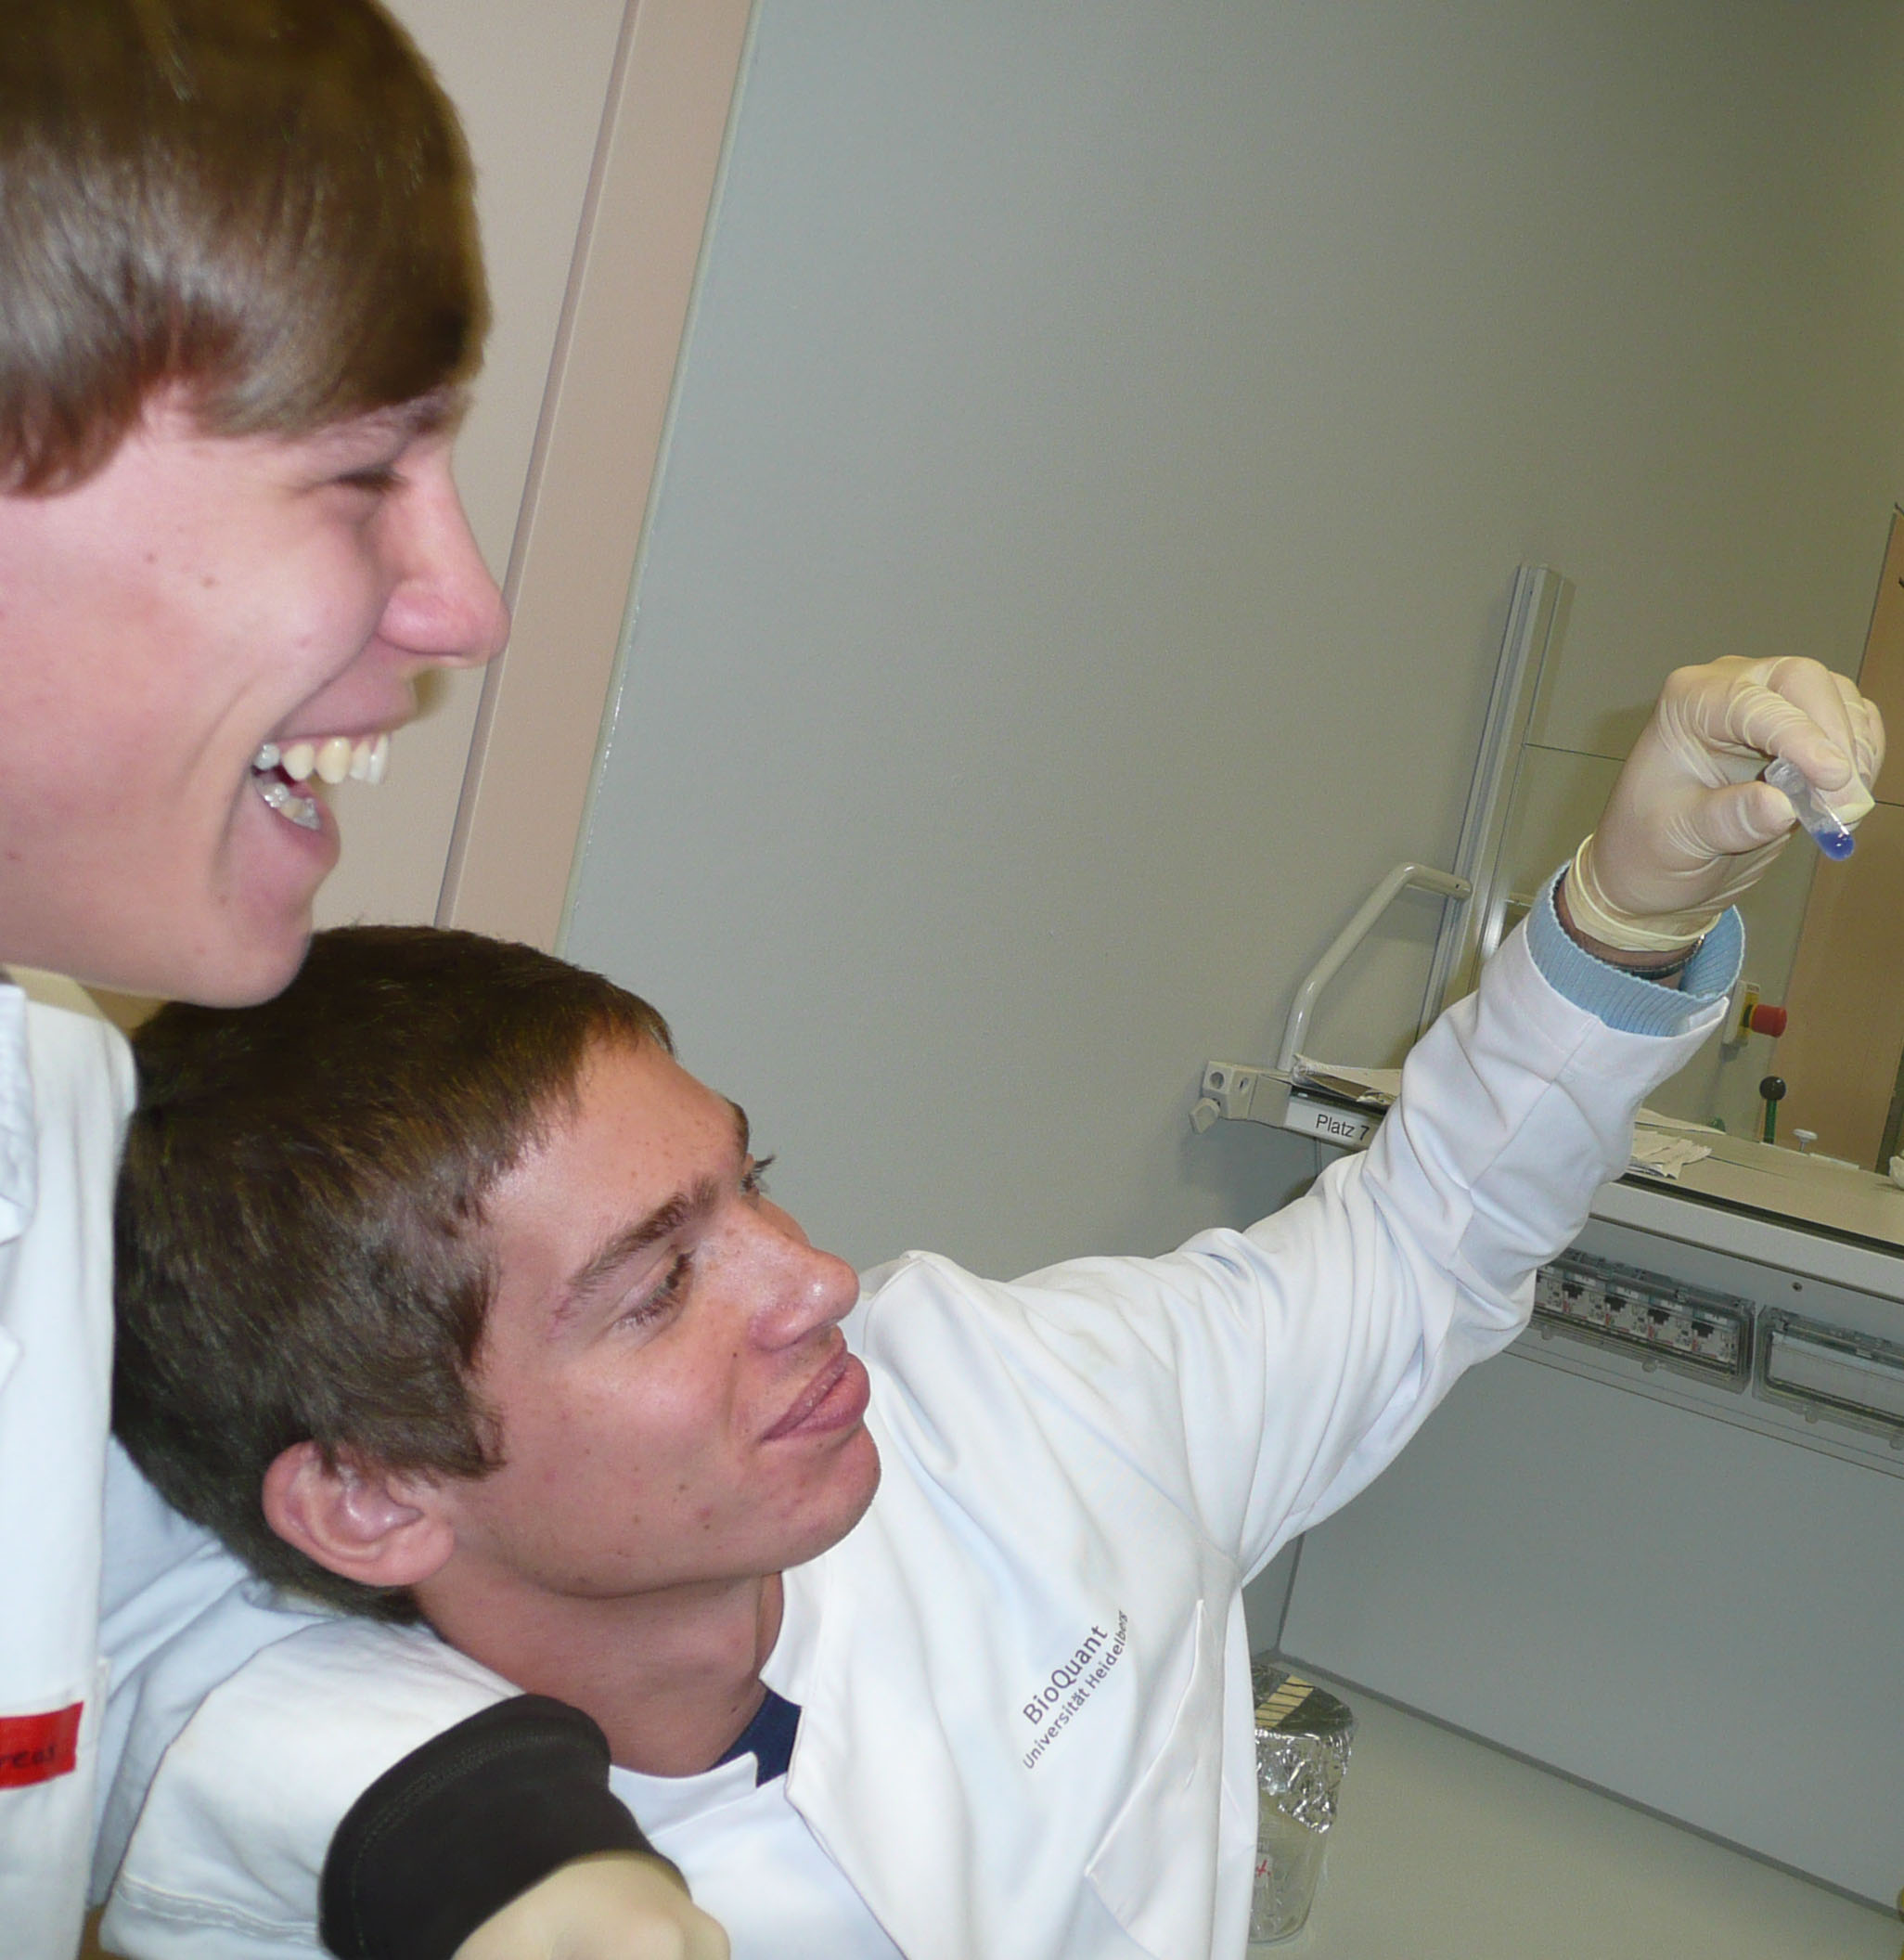
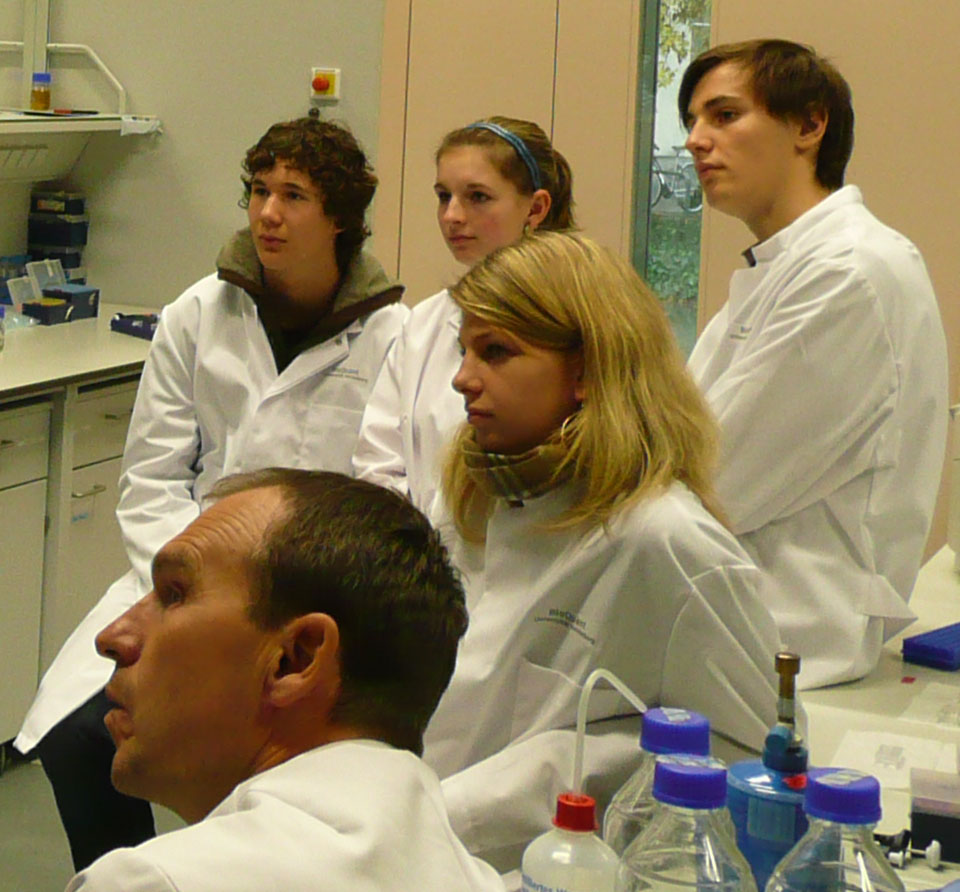
On the 27th of October, carriedout an Open Day for school classes from Speyer (Rhineland-Palatinate, Germany) and Hessen (Germany). Together they were 24 pupils. We presented Synthetic Biology, iGEM and our project. We also let the pupils experience to do lab work on their own and therefore set up a 3 hours parcours to visualize, isolate and proof the existence of Biobricks.
The motto of our Open Day was GFP - since this discovery was just awarded a Nobel Prize, is very impressive and very good to visualize. What we did was to first give the pupipls an introduction into synthetic biology, igem and our project. After this, we explained in greater detail the idea of biobricks. From this we came to GFP and showed them the part in the registry. One of the things that impressed them most was the registry: They couldn't believe that there is really DNA on the spots! We explained to them, how we actually work in the lab in when we use biobricks and lead over to the practical program of the day:
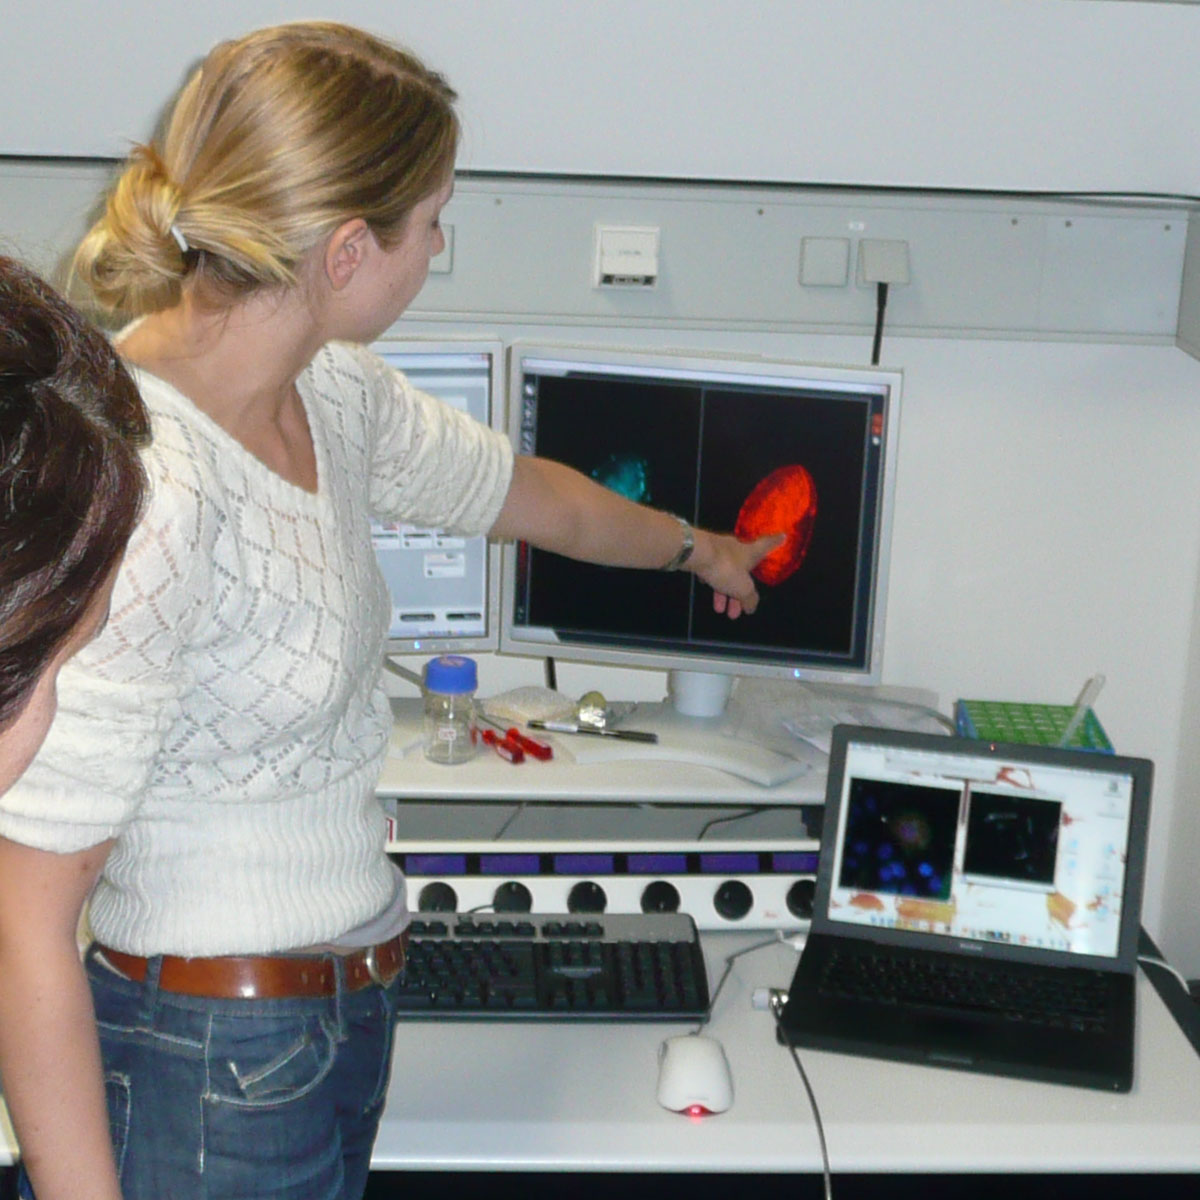
First, we showed GFP in action: We had prepared several cell lines - procaryotic as well as eucaryotic - and let them explore them under the microscope. They also explored their own cells of the mucous membane of the oral cavity with different staining methods in this part of the parcours.
Then we showed them how to isolate a Biobrick from a bacterial culture: Every pupil carried out a minipreparation under advisment of the students. By explaining every step of the plasmid preperation they got an insight into the prinziples of working with DNA - and sometimes wondered that it was really that simple to isolate a plasmid.
As a last step, we checked the resulsts of the miniprep and made a agarose gel electrophoresis. We are very proud of our visitors: Everybody accomplished to isolate the GFP plasmid and run it on the gel!
Ofter the practical part of the day we finished the jazzy, opening day with cake and coffee and had time to speak to the pupils in a relaxed atmosphere. Altogether we can say that we students had a great time and enjoyed introducing young, interested people into synthetic biology very much.- And the throughout positive feed-back of the pupils showed us that they enjoyed this day, too.
Feed-Back by the Pupils
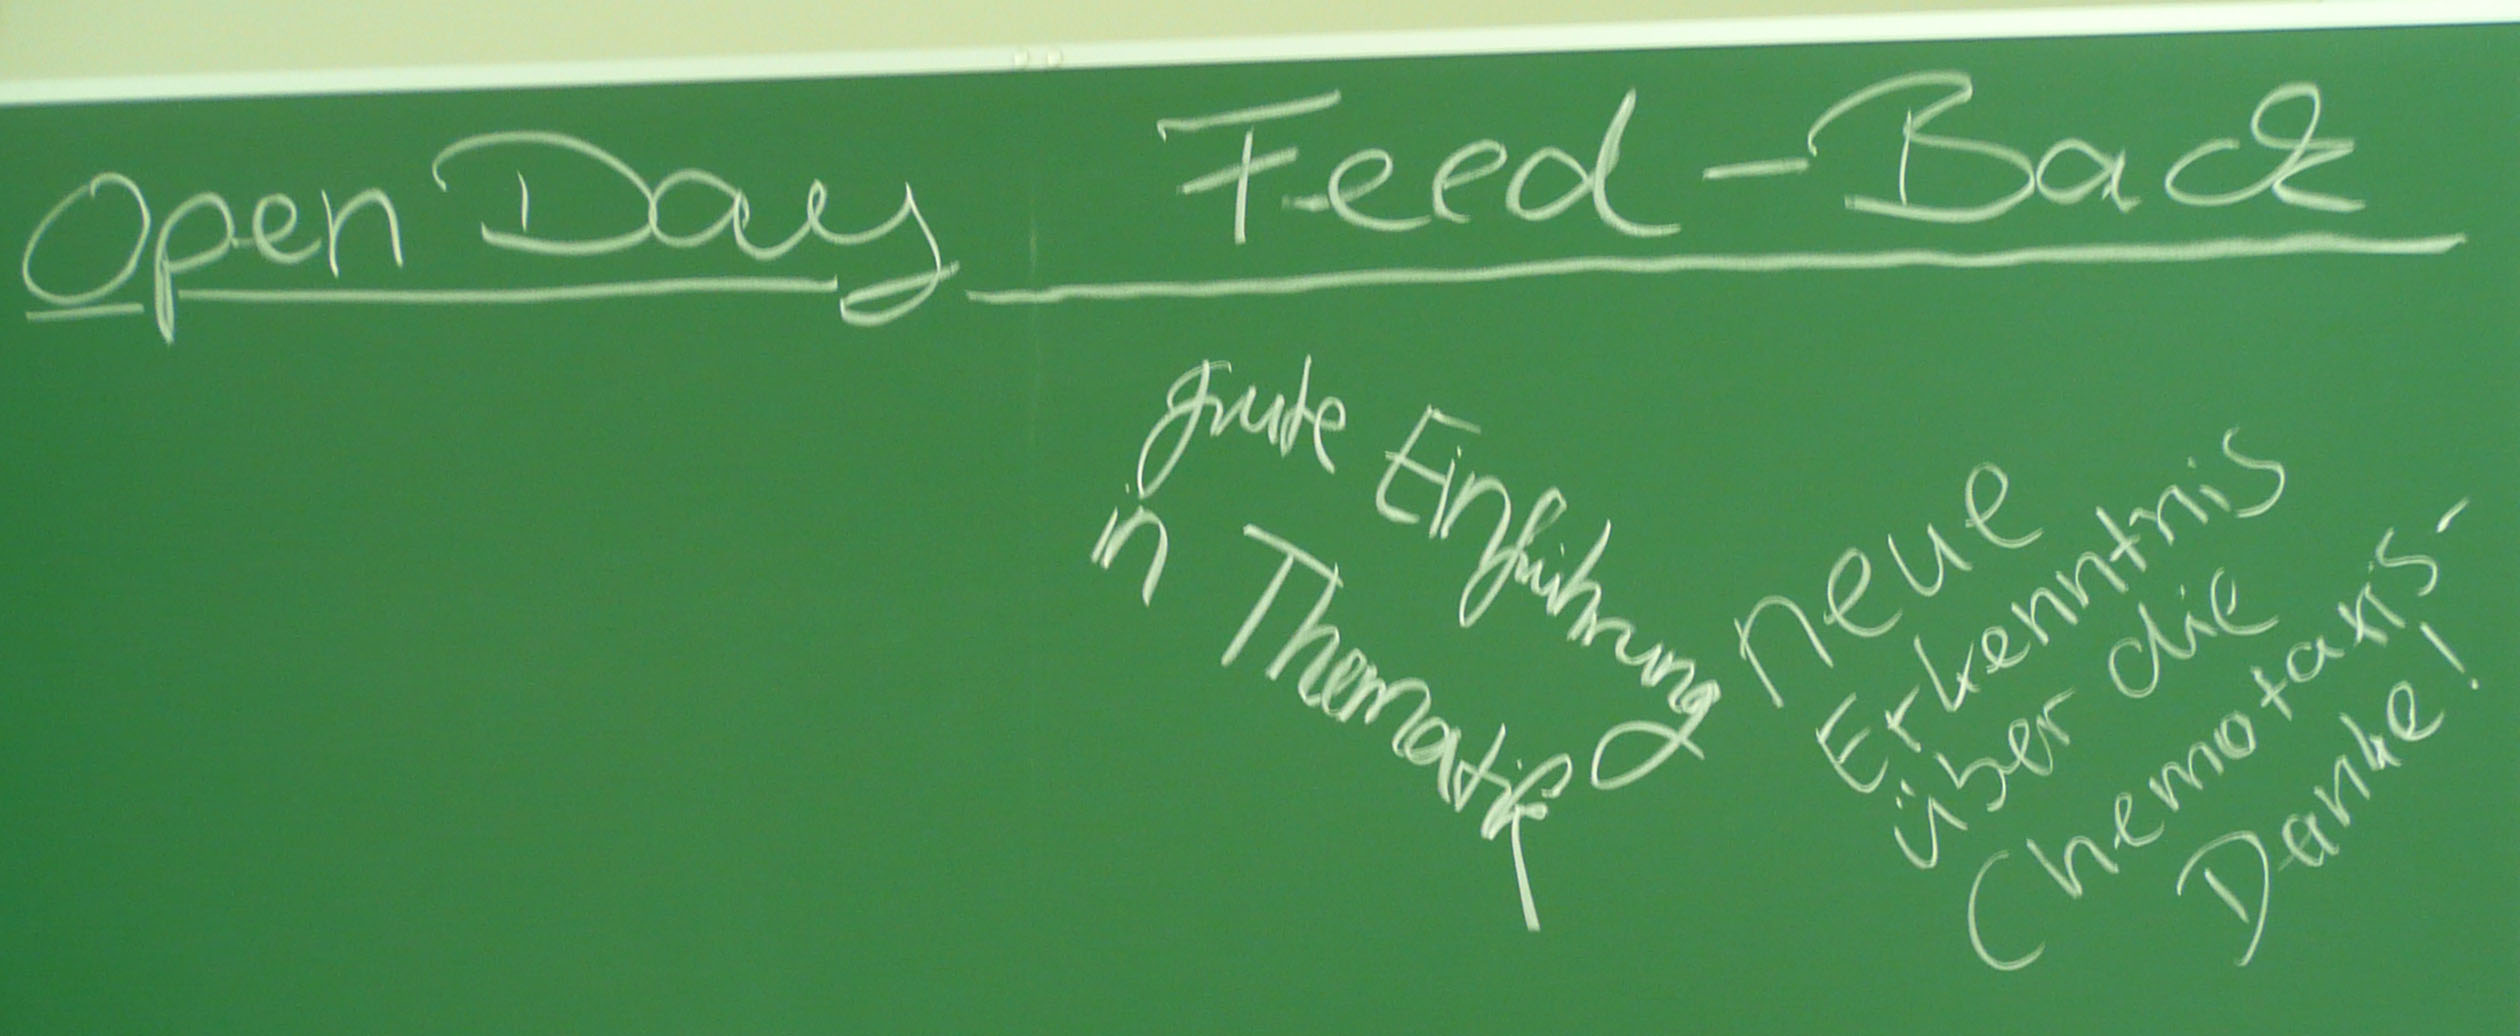
At the Open Day the pupils wrote some feed-back statements on the board in the seminar room, where we ate cake and drank coffee. We were very happy and impressed when we got a great feed-back by the pupils the next day. They wrote down their impressions of the open day in a short essay in their biology class at school together with their teacher and send to us the followning text (we translated the text in english, the original german version can be found below).
Letter from the teacher of the school class from Speyer, Mister Heppel:
| Open Day – iGEM (University of Heidelberg)
Following the invitation for the Open Day of the iGEM team Heidelberg, we, being the biology course of the Friedrich-Magnus-Schwerd Gymnasium, Speyer, got an insight into synthetic biology. We came to Heidelberg with 18 pupils. I, Peter Heppel, want to explicitly thank Professor Eils and Mister Niopek very much for the invitation. The program was very well planned and everything was presented in a way for my pupils to understand very well. Only on very rare occasions in the context of teacher’s training courses I have ever seen such a comprised, but informative and understandable introduction into a completely unknown topic. My impression is affirmed by the feedback the students gave me. This, too, is very positive. In particular, the pupils enjoyed doing work in the laboratory under the advice of the students. The following pages I attached show the feedback the pupils send me via email. On the one hand, they give a very good impression of the Open Day and on the other hand, there are some reasonable tips to enhance further Open Days from a pupil’s perspective. Kind regards, |
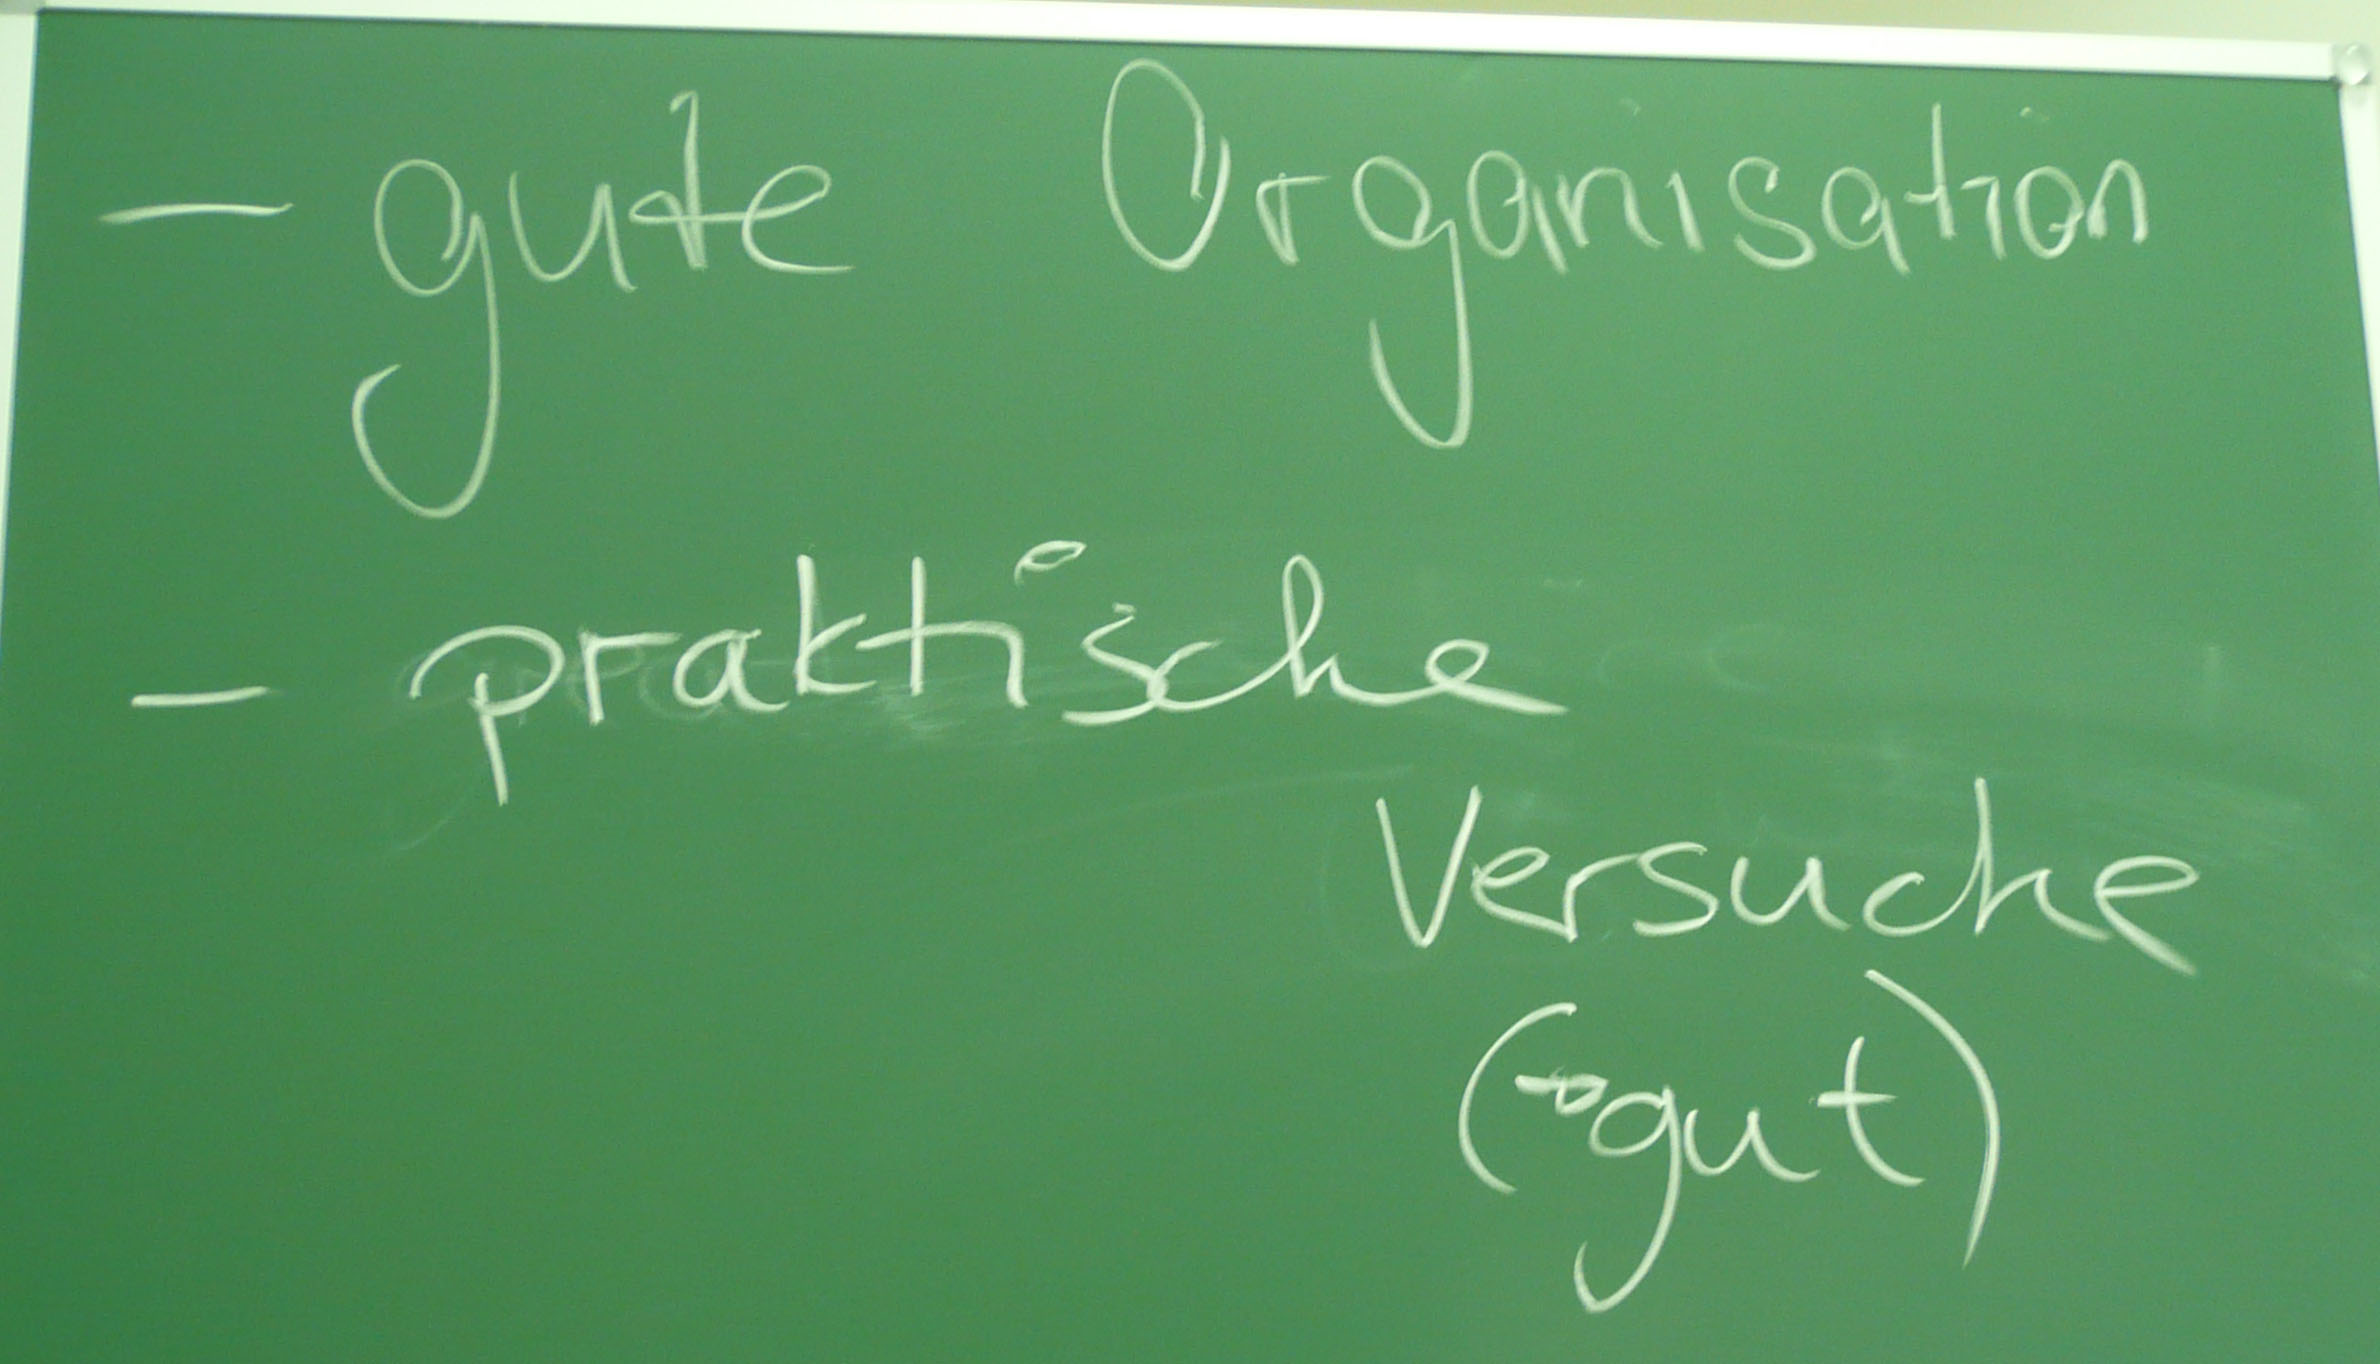
| "perfect organisation" | "I enjoyed working in the lab" |
| "The students answered all our questions in a very understandable way" | |
| "I was very impressed by the microscopes, I only knew them from television!" | |
| "The cake and the get-together at the end were great :)" | |
| "I did not understand every detail, but nevertheless I got a good impression of synthetic biology" | |
| "I liked doing the practical work" |
Material to carry out an Open Day on Synthetic Biology
We provide the idea and the material needed to carry out an open day for a school class, presenting synthetic biology and optionally iGEM.
Number of visitors: 25 pupils
Time needed: 5 hours
Schedule:
• Introduction and Presentation of iGEM, Synthetic Biology and your project. Download the presentation (german version) as ppt-file [http://rapidshare.com/files/157698230/Open_Day.ppt.html here] (rapdishare download file) and as pdf-file here. Download the english ppt-version [http://rapidshare.com/files/157744850/Open_Day_english.ppt.html here] (rapdishare download file) and as pdf-file here.
• Lab parcour including the stations: Microscopy, Miniprep, Gel electrophoresis
• Coffee and cake at the end of he opening day --> very importent to get into contact with the pupils in a relaxed atmosphere :)
Minipreparation
After being given a theoritcal introduction, the pupils carry out a plasmid minipreparation using a standard kit.
Theoritcal background:
All synthetic biologists in the lab need plasmids as very important tools for their work. You can find them in bacterial cells – either naturally, or put in there by scientists. The bacteria amplify the plasmids in their cells (they replicate them, meaning they make identical copies) and of course they multiply the total amount of plasmids by growing – more bacteria means more plasmids on the whole. If we want to work with these plasmids, like checking whether they are the right ones or engineering them, we need to get them out of the bacteria. Therefore we need plasmid preparation.
The procedure is simple, but honestly, it is not very convenient for the bacteria: We need to destroy them; scientists say to lyse them, to set the plasmids free together with the other contents of the cell. Then you will have a mixture of DNA (chromosome and plasmids), RNA, proteins and others cell components. But you only need the plasmid DNA in this case, everything else has to be separated from it, because the rest can have a negative effect on further applications.
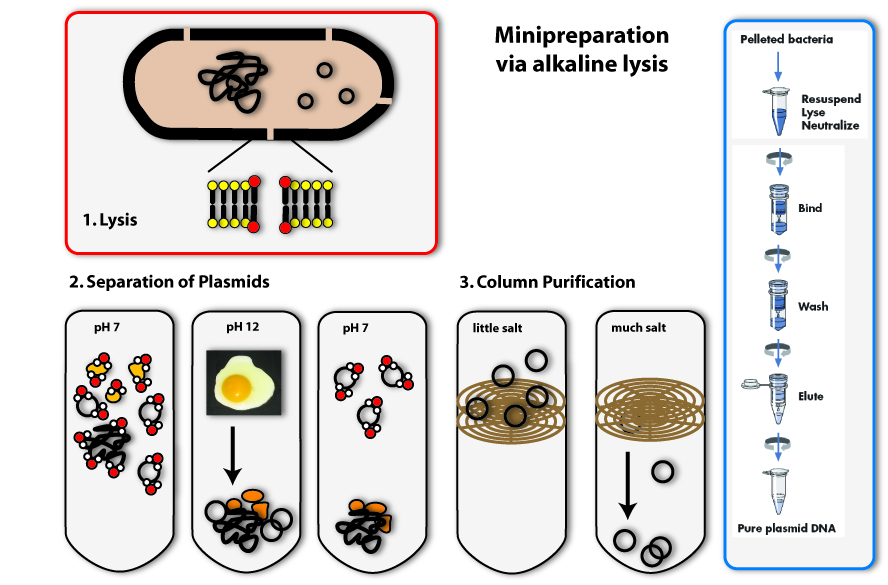
The method we mostly use in the laboratory to isolate plasmids is called alkaline lysis. This classical method is today standardized. Like the name implicates, you need alkaline agents for the lysis of the cell. Additionally, you use detergents, to break the cell wall and lyse the cells.
1. Lysis
You can, for example, also find detergents in washing agents. There they help to remove grease spots. This works as follows: Detergents have a very similar structure to lipids. They therefore can mix with them and loose their connection to fibres of the clothes. In Bacteria, they act in a very similar way: They mix with the lipids that form the bilayer of the plasma membrane and destroy there ordered structure. This is how they make holes in the plasma membrane, which leads to the lysis of the cell.
2. Precipitation and separation of proteins and chromosomal DNA
Now we come to the alkaline part of this procedure: In adding sodium hydroxide (NaOH) to the solution, the pH is increased from roughly 7 to 12. Because this is a huge contrast to the normal physiological pH, proteins and DNA denature and change their conformation. RNA is degraded. Proteins and DNA, which are denatured cannot be soluted any more and precipitate. You all know the phenomenon of denatured proteins from making fried eggs: The egg changes its consistency if you heat it and gets hard – this is due to the denaturising proteins. The same effect as heat, have acids or bases (like NaOH). In denatured DNA, the two strands get separated from each other.
The trick the alkaline method uses, to separate the plasmid DNA from the chromosomal DNA and the proteins, is to lower the pH again by adding acid (for example potassium acetate) to the solution. If the pH approximates the physiological one, the plasmids are able to renature first, because they are small and the two DNA strands find each other with a much higher possibility than the ones of the big chromosome. Therefore if you keep the renaturising step short, only the plasmids are able to build double helices and solute again. The chromosomal DNA and the proteins stay precipitated. They can be separated from the plasmids by centrifugation. (The white solids on the tube after centrifugation are the precipitated proteins, DNA and other cell components. The plasmid DNA is soluted in the clear supernatant.)
3. Binding of DNA
Now how do we get the plasmids out of this salty solution (remember we put a lot of salts to the solution to first rise, then lower the pH) into a clear one that can be used for further applications? You could precipitate the plasmids like we did with the proteins before, but there is another possibility, which is widely used today: You bind the DNA to a solid phase. This often consists of silica, which can be used in a bead like form, but in most cases, it is included in a column integrated in an eppendorf tube. The DNA can bind to the silica column, if the solution is very salty. If you centrifuge, the salty solution is drawn through the column into the tip of the tube and the DNA remains bound to the column.
4. Eluation of the plasmids
In the last step, you eluate the DNA from the column, meaning you loosen the bonds between DNA and silica and solute the DNA again. This is possible with every solution containing low or no salt at all. You can take water, for example. You put it on the column, centrifuge again, but this time the DNA will also be drawn through the column into the tip of the tube together with the water. You can then proceed to work with your purified plasmids: you can, for example, check, whether you have isolated the right one using agarose gel electrophoresis.
Minipräparation (German)
Eines der wichtigsten Arbeitsutensilien des Wissenschaftlers der Synthetischen Biologie sind Plasmide. Diese befinden sich in Bakterienzellen, beziehungsweise werden von Wissenschaftlern dort eingeschleust. Die Bakterien vermehren diese Plasmide in ihren Zellen; sie replizieren sie (fertigen identische Kopien an). Natürlich erhöhen sie die Gesamtanzahl an Plasmiden auch dadurch, dass sie sich teilen: mehr Bakterien produzieren entsprechend mehr Plasmide. Wenn wir nun mit diesen Plasmiden weiterarbeiten wollen, wenn wir sie zum Beispiel verändern möchten, oder auch nur schauen, ob die Bakterien tatsächlich die richtigen Plasmide besitzen, dann müssen wir die Plasmide wieder aus den Bakterien herausbekommen. Das machen wir mir Hilfe einer Plasmidpräparation.
Das Verfahren ist einfach, wenn auch nicht angenehm für die Bakterien: Um die Plasmide zu isolieren, werden die Bakterien schlichtweg zerstört, man sagt auch: sie werden lysiert. Dabei wird der Inhalt der Bakterien freigesetzt und mit ihm auch die Plasmid-DNA. Diese muss in den folgenden Schritten gereinigt werden, sprich von den Resten der Bakterien befreit und von noch vorhandenen Proteinen getrennt werden, denn diese würden die folgenden Arbeitsschritte stören.
Die Methode, die wir hierzu im Labor verwenden, und für die es auch standardisierte Verfahren zur Durchführung gibt (Kits und Automaten) ist die der alkalischen Lyse. Sie ist eine der klassischen Methoden zur Plasmidpräparation. Wie es der Name schon sagt, werden hierzu alkalische Substanzen verwendet, zusammen mit einem Detergenz (zum Beispiel Sodium Dodecylsulfat – SDS), um die Zellwand der Bakterien aufzubrechen, und diese so zu lysieren.
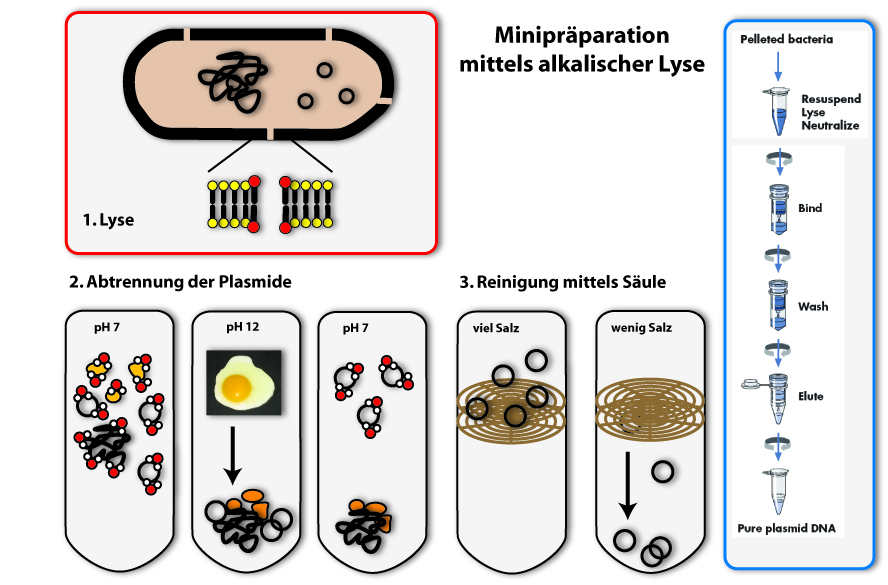
1. Lyse
Detergenzien findet man auch in Waschmitteln. Dort helfen sie, Fettflecken zu lösen, indem sie sich mit den Lipiden mischen und sie von den Fasern der Kleidungsstücke ablösen. Wenn man Detergenzien zu Bakterienzellen gibt, mischen sich sich unter die Lipide, die die Biomembranen des Bakteriums aufbauen und zerstören deren Ordnung. So entstehen Löcher in der Plasmamembran der Bakterien und sie lysieren.
2. Fällung und Abtrennen von Proteinen und chromosomaler DNA
Nun kommen wir zu dem Schritt, der der ganzen Methode den Namen gibt: Durch Zugabe von Natriumhydroxid (NaOH), einer Lauge, wird der pH der Lösung bis auf 12 erhöht. Da dieser sich sehr stark vom normalen pH in Zellen unterscheidet (pH 7,4), denaturieren unter diesen Bedingungen DNA und Proteine. RNA wird abgebaut (auch von extra hinzugegebenen Enzymen). Die denaturierte DNA und Proteinmoleküle sind in der Lösung nicht mehr stabil und fallen aus. Das Phänomen denaturierender Proteine kennt wohl jeder von Spiegeleiern: Erhitzt man die Eier verändert sich ihre Konsistenz und sie werden hart, weil durch die Hitze die Proteine denaturieren. Einen ähnlichen Effekt auf Proteine haben Säuren und Laugen. Beim Denaturieren von DNA trennen sich die beiden Stränge.
Der Trick der alkalische Lyse ist nun, die Plasmid-DNA von der restlichen DNA und den Proteinen zu trennen, indem durch Zugabe von Säure die Lösung wieder neutral(er) gemacht wird. Die kleine Plasmid-DNA kann als erstes wieder renaturieren und in Lösung gehen, wenn der pH-Wert sinkt, indem die beiden Partnerstränge sich finden und wieder eine Doppelhelix ausbilden. Dies geschieht wesentlich leichter und schneller als bei den großen chromosomalen DNA-Strängen. Lässt man die DNA also nur kurz bei neutralem pH, renaturiert nur die Plasmid-DNA und kann dadurch wieder gelöst werden. Die Proteine, genauso wie die DNA des Bakterienchromosoms können nicht wieder in Lösung gehen. Sie können von den Plasmiden getrennt werden, indem man das Ganze zentrifugiert. Die weißen Überbleibsel am Eppi sind die denaturierten Bestandteile der Lösung, im klaren Überstand sind die Plasmide gelöst.
3. Binden von DNA an eine Säule
Nun hätte man die Plasmide isoliert in Lösung vorliegen. Ein Problem ist aber, dass die Lösung sehr hohe Konzentrationen an Salz hat, welches zur pH-Veränderung zugegeben wurde. Hohe Salzkonzentrationen stören aber viele Folgeanwendungen der Plasmide, wie Restriktionsverdaue oder Sequenzierungen. Daher muss die DNA aus der salzigen Lösung in eine weniger salzige überführt werden. Eine Möglichkeit, das zu erreichen, wäre die Plasmide, ähnlich wie die Proteine zuvor, auszufällen und in Wasser neu zu lösen. Wir verwenden in der Regel jedoch eine andere Technik: Wir binden die Plasmide an ein festes Trägermaterial, und trennen sie so von ihrem Lösungsmittel. Der Träger ist häufig Silikat. Es wird in Form von Säulen verwendet, die sich in einem Eppendorf-Tube befinden. Daran kann die DNA binden, solange sehr viel Salz in der umgebenden Flüssigkeit ist. Das Prinzip dieser Säulentechnik ist es, die DNA an die Säule unter Hochsalzbedingungen zu binden (wir erinnern uns, dass nach der Abtrennung der Proteine sehr viel Salz in der Lösung vorhanden ist). Gibt man also die Lösung aus dem vorherigen Schritt auf die Säule und zentrifugiert, bleibt die DNA an der Säule haften, das Lösungsmittel mit den Salzen und andere Verunreinigungen werden durch die Säule gezogen und können verworfen werden.
4. Eluieren der DNA
Gibt man auf die Säule mit der DNA eine Lösung ohne / mit wenig Salz, zum Beispiel Wasser, und zentrifugiert erneut, löst sich die DNA im Wasser und wird mit diesem durch die Säule gezogen. Man erhält in dem Säulendurchfluss (Eluat) eine Lösung mit der reinen DNA.
Von der gereinigten DNA kann man anschließend die Konzentration bestimmen, um zu sehen, wie viel isoliert wurde. Man kann dann mittels Agarose Gelelektrophorese überprüfen, ob auch die gewünschte DNA isoliert wurde, und nicht etwa irgendetwas anderes.
Agarose Gel Electrophoresis
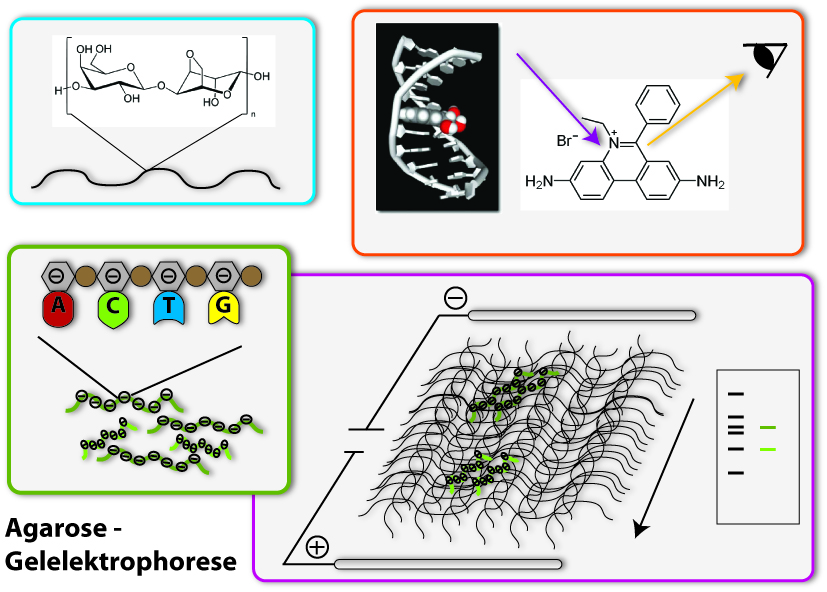
One of the most important tools in synthetic biology are bacterial plasmids. We already showed how they can be isolated and engineered. But how can you check, if really the right DNA has been isolated, for example? Of course, you can not see DNA! But you can determine the length of the DNA- fragments. Each DNA sequence has a defined length, because it is made of the same bricks, the nucleotides: So, a DNA-sequence, which is build of 400 nucleotides, has a length of 400 times the length of one nucleotide, naturally. Biologists generally call this length 400 base pairs (because every nucleotide contains a base, which is responsible for the encoding of the genetic information). A DNA-sequence containing 800 nucleotides is twice the length of the first one. To determine these differing lengths, we use agarose gel electrophoresis. So let us go through the steps of the procedure:
1. Production of the gel
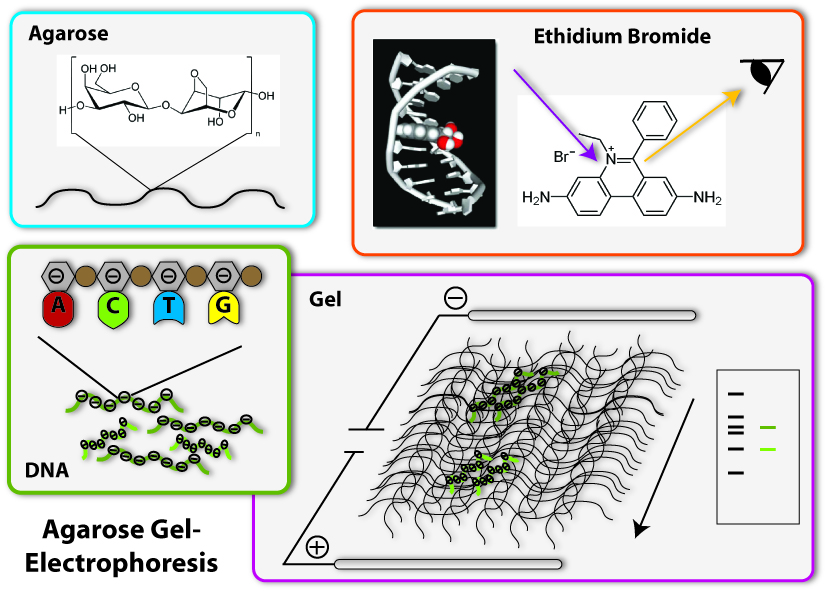
The basis fort he separation of the DNA- fragments is provided by the agarose gel. Agarose consists of long chains of sugar molecules, which are very similar to the ones we daily eat in candies. The speciality of agarose is that the chains of sugar molecules can bind to each other to form a dense network. Thereby there consistency becomes gel like. This happens, if agarose is soluted in water and thereafter boiled. When the liquid cool down, it changes its consistency, becomes harder and forms a gel. You call this polymerization. Everybody who loves wobble pudding knows this phenomenon from gelatine. The agarose gel will serve as a molecular sieve, which the DNA will have to pass and wind through in the later steps. The higher the concentration of dissolved agarose is, the smaller the pores in the network are and the harder it will be for the DNA to find a way through. To prevent the gel from drying and provide enough liquid for the journey of the DNA, the gel is put into a buffer, a solution which supports the following procedure.
2. Loading of the DNA
The DNA will now be loaded on one side of the gel. Therefore little slots have been formed on one side of the gel, so the DNA can be poured into them. Before this can happen, there need to be added some components to the DNA sample: First, a dye called Bromphenol Blue is added. This dye shows how far the solution put in the slots has already wandered in the gel, so the journey of the DNA can be stopped before it leaves the gel at the opposite side. Moreover, glycerol is added to the DNA samples. The density of glycerol is higher than the density of water, therefore it sinks to the bottom if put into a watery solution. If mixed with the DNA sample, glycerol makes this sample ‘heavier’ and lets it sink to the bottom of the slots in the gel. Without glycerol, the DNA-sample could easily mix with the buffer already in the slots, could again leave the slots and spread over the whole gel. Then it would be wasted, because it could not run through the gel and be separated.
3. The electric field
Now we come to the actual process of the electrophoretic separation of the DNA-fragments. Therefore an electric field is applied between the two ends of the gel. This can affect the DNA, because DNA is a charged molecule. The backbone of the DNA partly consists of phosphates. These are the acid radicals of phosphoric acid, which you all know from cola: there it is responsible to make cola sour. These acid radicals are negatively charged and thereby give the whole DNA molecule a substantial negative charge. To draw the DNA-fibres through the agarose network, we now use the electric field: Since positive charges and negative charges attract each other, the DNA is drawn through the gel if one installs the positive pole of the electric field at the opposite end of the gel (opposite to the slots filled with DNA). Additionally, the negative pole is installed at the ‘back’ of the DNA behind the slots. Since charges with the same character repel each other, the DNA molecules are ‘kicked away’ from the slots. So far, everything is clear; the DNA- molecules wander through the agarose network in direction of the positive pole. But how are they separated according to their length? This is achieved due to the different behaviour of DNA-molecules with different lengths in this electrically enhanced gel: Long DNA- fibres are much slower in passing the network than short ones are because they constantly get stuck at the agarose fibres and have problems to get through the tiny pores. After a certain time of gel run, the long fragments are in a position much closer to the slots than the short fragments. The short ones are therefore running faster and have passed a much longer distance. So the ratio of running time to the passed distance is proportional to the length of the DNA-fragments. Therefore it is characteristic for the fragment length. Because of this you can approximate the length of an unknown fragment from comparing its running distance to the one of a fragment you already know the size of. Fragments with the same length are running at the same speed. Therefore they are located at the same level in the gel after a certain running time. You call a part of a lane in the gel, where DNA- fragments of the same length accumulate, a band. If you put DNA samples on the gel, where you don’t know the length of, and put DNA samples of defined length into another slot of the gel, you can compare the bands after a certain running time. If one band of the unknown sample is located at the same level than the defined sample which you know is 500 base pairs long – you then know: The unknown sample also contains DNA- fragments with 500 base pairs length. To simplify the work of molecular biologists, there have been developed mixtures of DNA- fragments with defined lengths, which can be put on the gel together with the samples to investigate. These mixtures are called ladders, because they form multiple bands which resemble a ladder. These ladders in principle are scales, which show you at which position in the gel the DNA- fragments with 500 base pairs should be, at which the ones with 100 base pairs and so on.
4. Staining of the DNA
Now we have separated the DNA- fragments, how can we actually see them? Since up to now, the gel is colourless, only the blue dye we put in it can be seen, but no DNA- bands. So we have to stain the DNA to visualize it. This is done with the help of a dye called ethidium bromide. This dye can slide in between the base stocks of the DNA double helix, you also say it intercalates. So ethidium bromide intercalates into the DNA strands in regular intervals and thereby each strand is enriched with a certain amount of the dye. But still you can not see anything. This is because this dye needs to be activated, before it shows its colour, which then will be orange. To activate the dye, you illuminate it with UV-light (which contains very much energy). Now the dye will actually shine orange.
But the real thing which is special about ethidium bromide is that it shines much more intensively (50 to 100 times), if it is intercalated into DNA, than if it is free. So you can clearly differentiate the areas where DNA is one the gel (the bands) from the rest if you illuminate the gel with UV-light. Only they will shine in an orange colour. To document your gel results, you generally take a picture.
Agarose Gelelektophorese (German)
Eines der wichtigsten Werkzeuge in der synthetischen Biologie sind Plasmide. Wir haben schon gezeigt, wie man diese Plasmide verändern kann und auch, wie man sie aus Bakterienzellen isolieren kann. Aber wie überprüft man, ob tatsächlich die richtige DNA isoliert wurde? Man kann DNA ja nicht sehen. Aber man kann ihre Länge bestimmen. Jede DNA Sequenz hat eine bestimmte und bestimmbare Länge. Denn alle Sequenzen sind aus den gleichen Grundbausteinen aufgebaut, die sozusagen eine Einheitslänge besitzen. Eine Sequenz, die aus 400 Nukleotiden besteht, ist also 400 mal die Länge eines Nukleotids lang. Biologen sagen in der Regel, sie ist 400 Basenpaare lang (jedes Nukleotid trägt eine Base, und bei doppelsträngiger DNA besteht jede „Längenposition“ aus den beiden komplementären Nukleotiden oder Basen). Die gängigste Methode für diese Überprüfung ist die Agarose-Gelelektrophorese. Wir wollen ihre verschiedenen Arbeitsschritte nacheinander gemeinsam durchgehen:
1. Herstellung des Gels
Die Grundlage für die Auftrennung der DNA bietet das Agarosegel. Agarose besteht aus langen Ketten aus Zuckerbausteinen, die mit den Bausteinen verwandt sind, die den Zucker aufbauen, den wir täglich konsumieren. Das Besondere ist, dass die Agarosefäden zu einem dichten Netzwerk verbunden werden können, und so eine gelartige Struktur annehmen. Dies geschieht, wenn man Agarose in Wasser löst und aufkocht. Die Agarose löst sich und wenn die Flüssigkeit abkühlt wird sie fest, man nennt das Polymerisieren. Ein ganz ähnliches Phänomen kennen sicher alle Wackelpuddingliebhaber von der Haushaltsgelatine. Dieses Gel wirkt als molekulares Sieb, hier muss sich später die DNA durchschlängeln. Je höher die Agarose konzentriert ist, desto kleiner sind die Lücken im Netzwerk, und desto schwerer ist das Durchkommen. Damit das Gel nicht austrocknet, und genügend Flüssigkeit für die Wanderung der DNA vorhanden ist, wird es in eine Flüssigkeit gelegt, wir sagen, in einen Puffer, in dem die folgenden Geschehnisse stattfinden.
2. Auftragen der DNA
Die DNA wird nun in eine Seite des Gels eingebettet. Dazu wurden bei, Gießen des Gel Taschen freigelassen, in die die DNA eingefüllt werden kann. Bevor dies geschieht, wird noch ein Farbstoff zur DNA gegeben: Bromphenolblau. Er zeigt uns, wieweit die Flüssigkeit sich schon bewegt hat, damit wir das Gel rechtzeitig stoppen können. Stoppt man das Gel zu spät kann es passieren, dass die DNA schon aus dem Gel gelaufen ist – dann muss der Versuch wiederholt werden. Außerdem befindet sich in der Lösung mit dem Farbstoff noch Glycerin. Dieses hat eine höhere Dichte als Wasser und sinkt daher ab, wenn man es zu einer wässrigen Lösung gibt. Der Sinn davon ist, dass es die Lösung mit der DNA „schwerer macht“, und diese leichter absinkt, wenn man sie in die Geltaschen pipettiert – sonst würde sie sich zu sehr mit der Pufferlösung mischen und am Ende aus der Tasche entweichen und sich verteilen.
3. Das elektrische Feld
Jetzt kommen wir zum eigentlichen Auftrennungsprozess: Zwischen den beiden Enden des Gels wird ein elektrisches Feld angelegt. Dieses kann auf DNA wirken. Denn DNA ist ein geladenes Molekül: Im Rückgrat der DNA, an dem die Basen, die die genetische Information codieren befestigt sind, befinden sich sogenannte Phosphatreste. Dies sind Reste der Phosphorsäure, (die jeder von euch schon mal getrunken hat: Sie ist ein wichtiger Bestandteil von Cola!). Diese Säurereste sind negativ geladen und geben so in regelmäßigen Abständen dem gesamten DNA-Strang eine beträchtliche negative Ladung. Um die DNA-Fäden durch das Agarose- Netzwerk zu bewegen, nutzen wir nun das elektrische Feld: Positive elektrische Ladungen ziehen negative an. Das bedeutet, die positive elektrische Ladung muss sich auf der gegenüberliegenden Seite von den Geltaschen befinden, damit die DNA durch das Gel wandert. Legt man die negative elektrische Ladung hinter die Geldtaschen, beschleunigt sie die Wanderung der DNA zusätzlich, denn gleichartig geladene Teilchen stoßen sich ab. Die negative Ladung „im Rücken“ der DNA-Fäden gibt ihnen sozusagen einen Schubs von hinten. Soweit so gut, die DNA- Fäden bewegen sich durch das Netzwerk auf den positiven Pol zu. Aber wie werden sie entsprechend ihrer Größe aufgetrennt? Die langen DNA-Fäden bewegen sich wesentlich schwerfälliger durch das dichte Netzwerk als die kurzen kleinen Fäden, weil sie ständig an Agarose hängen bleiben und nicht so gut durch die kleinen Poren kommen. Sie befinden sich also nach einer bestimmten Zeit wesentlich weiter hinten (in Richtung der Geltaschen) als die kurzen DNA-Stücke, die sozusagen schneller ‚rennen’ und daher nach gleicher Zeit eine weitere Strecke zurückgelegt haben. Dieses Verhältnis aus Laufzeit und zurückgelegter Strecke ist damit proportional zur Länge der DNA-Moleküle und somit auch charakteristisch für sie. Man kann dadurch auch auf die Länge unbekannter DNA-Stücke durch den Vergleich mit der Laufweite bekannter DNA-Stücke schließen. Stränge gleicher Größe bewegen sich gleich schnell, weshalb sie sich nach einer bestimmten Laufzeit durch das Gel alle auf gleicher Höhe befinden: Man nennt solche Bereiche in einer Spur (Verlängerung einer Tasche) des Gels, in denen sich DNA gleicher Länge befindet, eine Bande. Gibt man DNA-Stücke mit den Proben auf das Gel (in eine andere Spur wie die Proben-DNA, so dass man sie unterscheiden kann), deren Länge man kennt, dann kann man aus dem Vergleich ihrer Laufstrecke mit der der unbekannten Proben auf die Länge der Probe schließen. Ist zum Beispiel die DNA einer unbekannten Probe genauso weit gelaufen, wie ein DNA-Fragment von 500 Basenpaaren (das ist die Längenangabe, die in der Regel für DNA verwendet wird), dann ist das unbekannte Fragment ebenfalls 500 Basenpaare lang. Um den Molekularbiologen diese Abschätzung zu erleichtern gibt es fertige Mixturen mit DNA-Fragenten verschiedener bekannter Längen, sogenannte Standards, die bei jeder Gelelektrophorese verwendet werden und eine Messskala auf dem Gel darstellen, an der die Länge der DNA-Fragmente in den aufgetragenen Proben abgelesen werden kann.
Die Dauer der Elektrophorese hängt hierbei von der eingesetzten Stärke des elektrischen Feldes, der Spannung ab (je höher die Spannung, desto schneller wandern die Fragmente), der Konzentration der Agarose im Gels (je höher der Agarose-Anteil, desto länger dauert die Elektrophorese, weil die Poren kleiner sind und die DNA es schwerer hat, sich durchzuwinden) sowie der Länge der Wegstrecke, die die Fragmente wandern sollen, ab.
4. Färben der DNA
Wie kann man denn nun die DNA sichtbar machen? Denn wenn wir uns das Gel jetzt anschauen, sehen wir nichts außer den blauen Farbstoff, den wir zugegeben haben. Wir müssen die DNA anfärben, um sie zu sehen. Dies geschieht mit Hilfe von Ethidiumbromid. Dieser Farbstoff hat kann sich zwischen die Basenstapel der DNA schieben, man nennt das interkalieren. Dies geschieht in regelmäßigen Abständen. So nimmt jeder DNA-Strang eine bestimmte Menge Ethidiumbromid auf. Der Farbstoff leuchtet orange, wenn er mit UV-Licht angeregt wird. Das Besondere ist jedoch, dass er wesentlich intensiver leuchtet (50-100) mal, wenn er in DNA interkaliert ist, als wenn er frei vorliegt. Daher kann man die Bereiche, in denen sich DNA im Gel befindet, deutlich von den anderen unterscheiden, wenn man das Gel mit UV-Licht beleuchtet. Nur sie strahlen orange und man sieht abgesetzte Banden, in denen sich jeweils die DNA-Fragmente gleicher Länge befinden. Zur Dokumentation wird in der Regel ein Foto geschossen. Ethidiumbromid ist aber nicht nur ein sehr nützlicher, sondern auch ein sehr giftiger Stoff: Er interkaliert nicht nur in unsere Proben- DNA, sondern wenn wir ihn auf die Haut bekommen, oder ihn sogar verschlucken, interkaliert er auch in unsere DNA. Das bringt dann alle Vorgänge, die im Zusammenhang mit unserem Erbgut stehen, wie Zellteilung oder Proteinproduktion durcheinander bringen. Im schlimmsten Fall können dadurch Zellen zu Krebszellen werden. Man bezeichnet Ethidiumbromid daher als krebserregend. Deshalb gelten im Labor besondere Vorsichtsmaßnahmen beim Umgang mit Ethidiumbromid.
GFP and fluorescent microscopy
After we have learned how to isolate a plasmid and check this on a gel, we will have a look on the effects of such a plasmid. As an example, we chose the Green Fluorescent Protein. You may learn more about how to bring the genes for this protein from the original organism into a bacterial plasmid in the molecular cloning article.
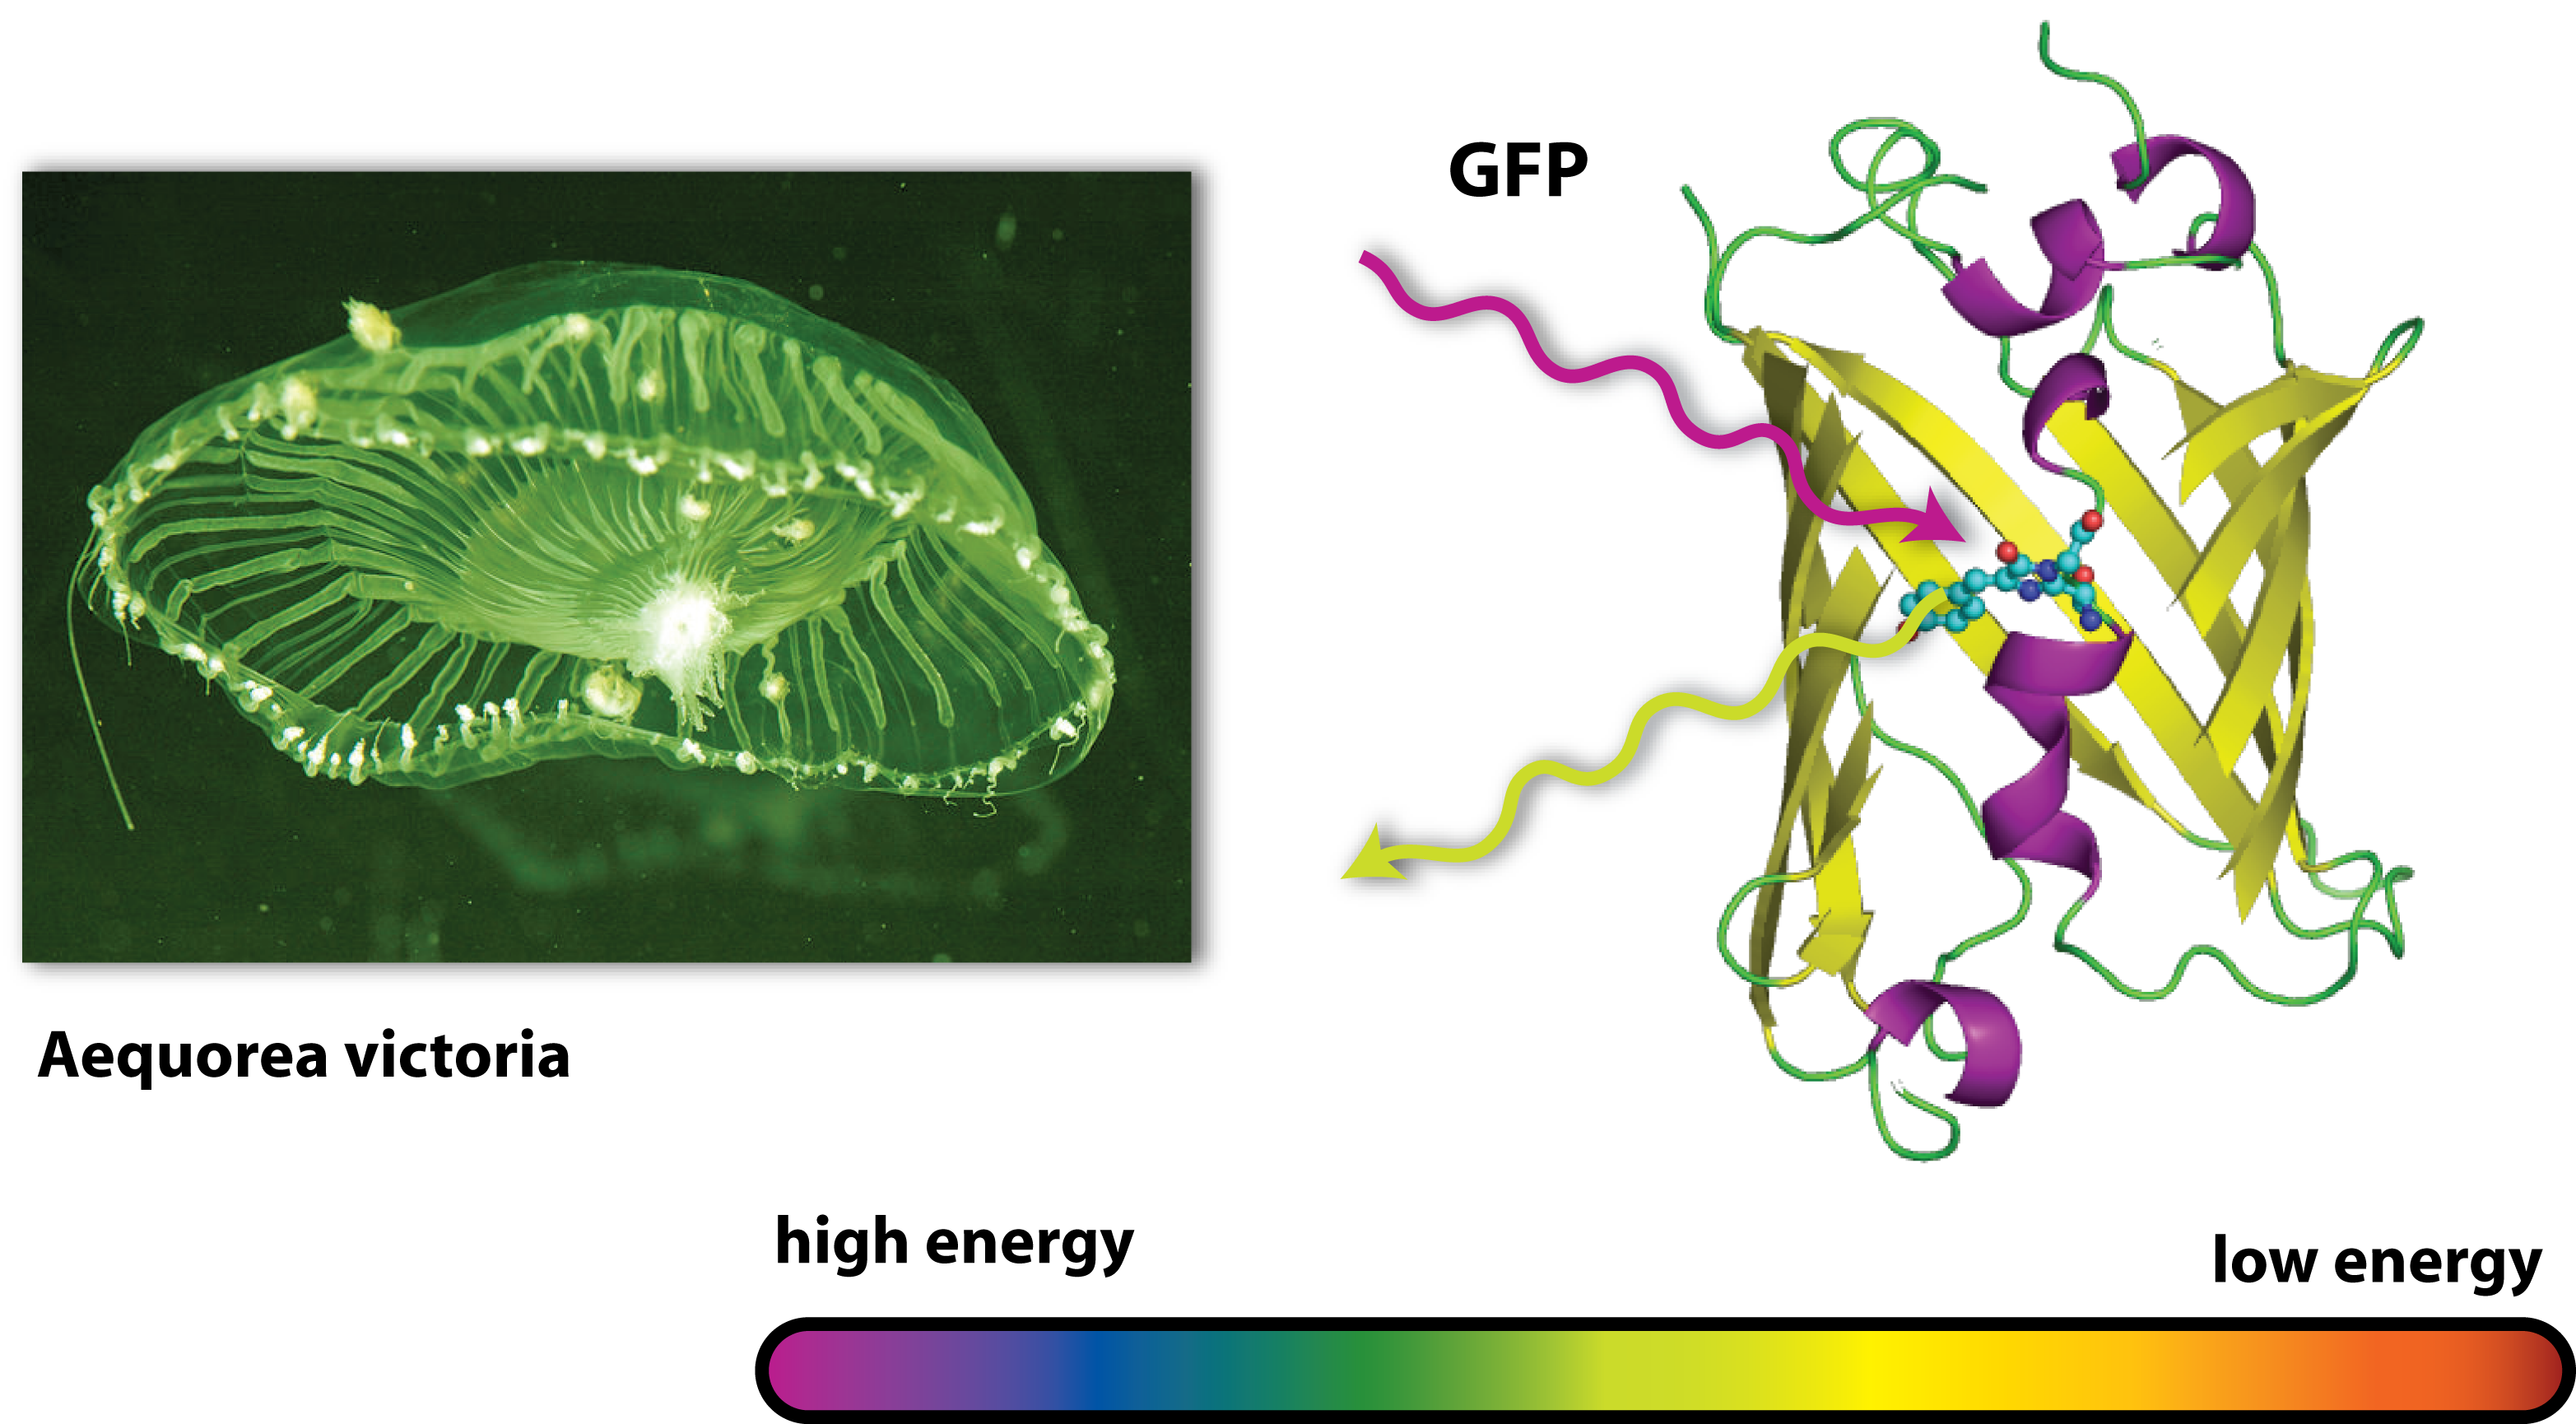
Originally, GFP is produced by jellyfishs. It has been isolated from the jellyfish Aequorea victoria, which is also sometimes called crystal jelly. So this animal, which is living off the west coast of North America, is able to make itself glow green. Generally, the ability of an organism to produce light as the result of a chemical reaction is called bioluminescence. Another famous animale in terms of bioluminescence is the glow-worm.
GFP is the oldest and most broadly used fluorescent protein in biotechnology. It is a protein, which is able to absorb light and emit light of lower energy and thereby glows green. Because it had such a great impact on this science and improved it a lot, this year’s Nobel Prize in chemistry was awarded for the discovery of GFP and its applications. If GFP is made by a cell and you illuminate this cell with UV-light, you can see a green light coming from this cell.
But how does this work? GFP works as a light catcher. There is a light catching complex inside the barrel like protein that can catch high energy UV-light. All the energy of this light flows into the light catching complex and activates it. Imagine a child with a lot of power and energy: It runs through your apartment, sings, screams and jumps some time. So it is kind of ‘activated’ and sets all its energy free. After a while, there is only little energy left, it gets quieter, tired and maybe falls asleep. In a way it is the same with GFP. In the very activated state, it can not hold all the energy it got and has to set it free. Since there is no singing and jumping GFP, it finds another way to lose all its power: It emits light. But not UV-light, like the one it got all the energy from, but green light. Therefore it is called GFP. But why is this? You may have heard of the general rule in science, that there is no process that can work without consumption of energy – this is why there exists nothing like Perpetual motion. So the GFP emits light with a lower energy than the one it first caught or absorbed. And light with a little lower energy than UV light is green. (This goes one according to the colours of the rainbow: Yellow light has less energy than green one, orange light less than yellow light and red light less than orange light). But where does the remaining energy go to, if the GFP sets free less energy than it absorbed? Well this energy is needed for the process of emitting light, for the process of glowing green.
Now we understand how GFP works. And if this protein is produced in a bacterial cell by a plasmid, the bacterial cell will glow green. You can see this when you illuminate a liquid bacterial culture with UV light.
Or you can see it with the help of a fluorescent microscope, which enlarges the vision of the bacteria and also has a source of UV light to activate the GFP protein. You can not only visualize whole bacterial cells with GFP, but also fine structures and single proteins. Because you can stick GFP to proteins you want to visualize, and it will keep its glowing ability and also won’t disturb the normal cell procedures.
There are also many derivatives of GFP available today. They all have little modifications, which change the colour of the light, the protein emits. So there is RFP, which emits red light, or YFP (yellow) and so on. With the help of all these fluorescent proteins, you can make funny thinks like drawing pictures or make animals glow. But they are, as mentioned above, primarily most important tools in biological and medical research.
 "
"
