Team:Paris/Modeling/Protocol Of Characterization
From 2008.igem.org
|
Protocol of Characterization
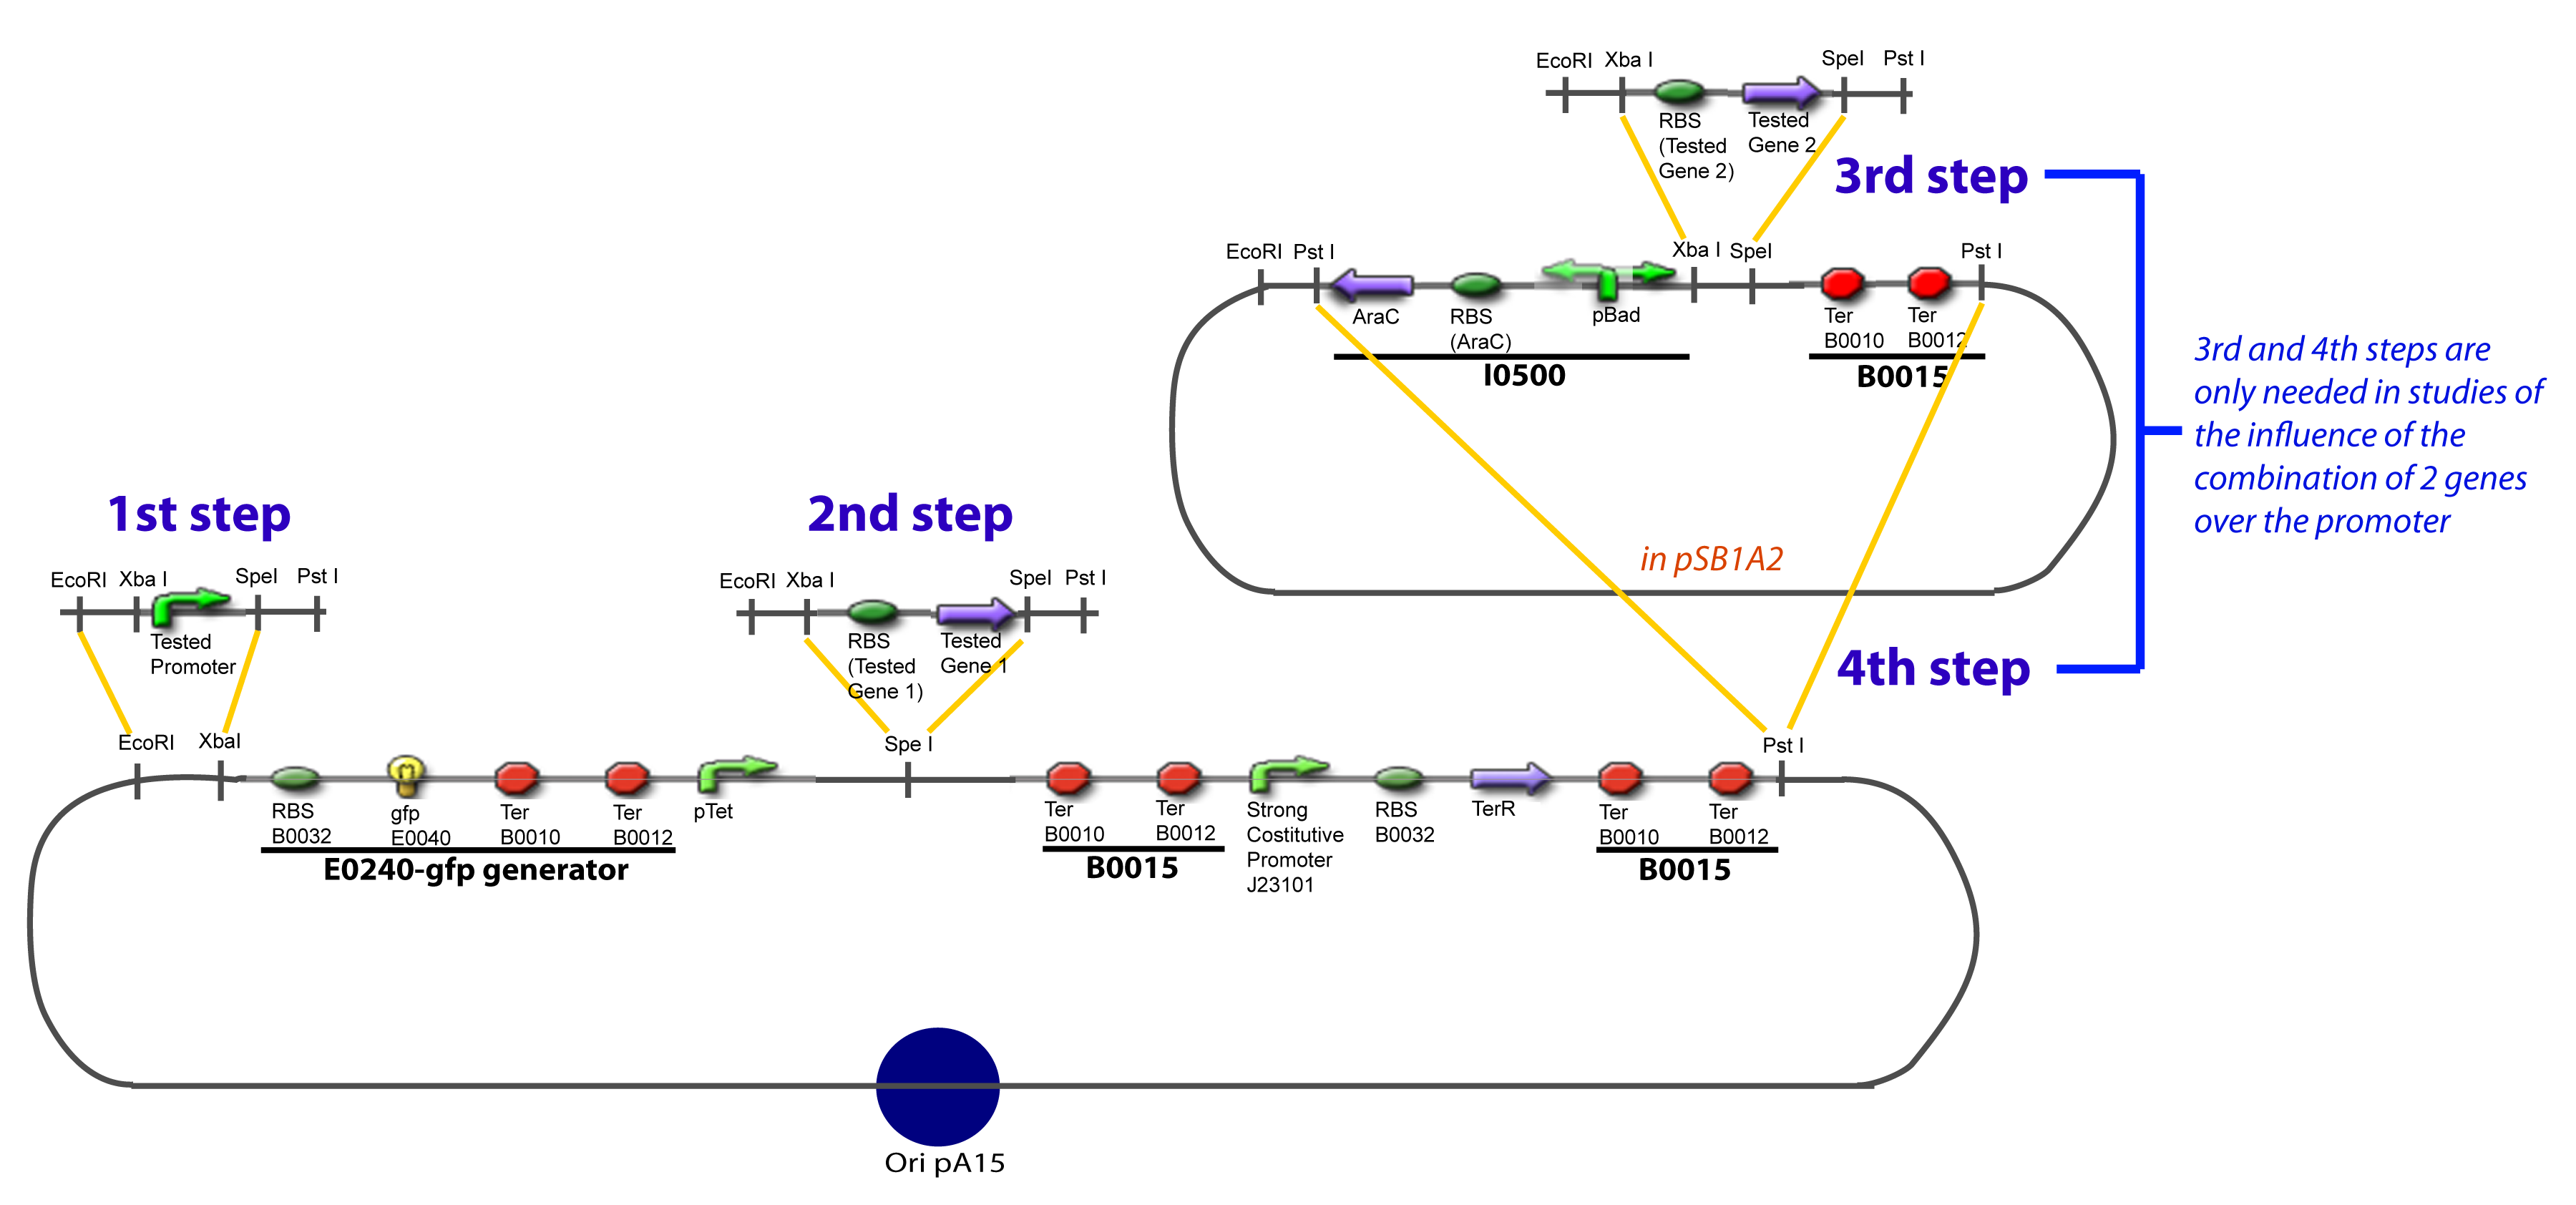
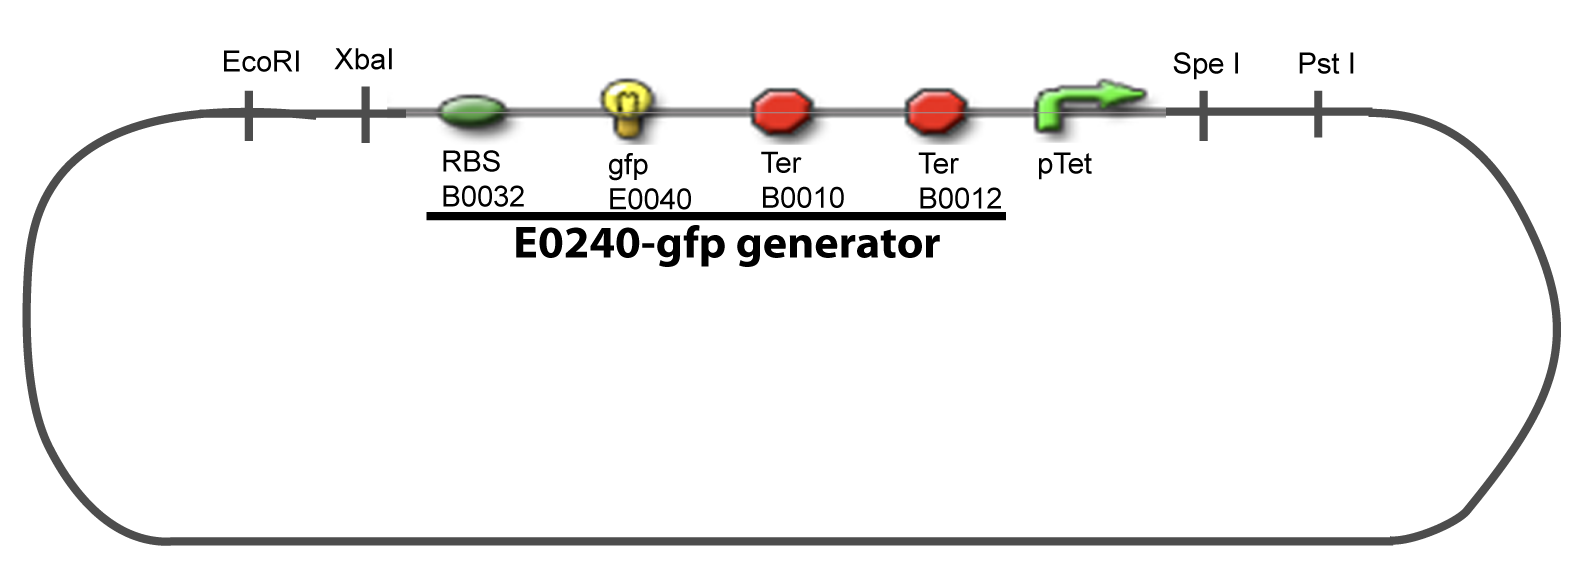
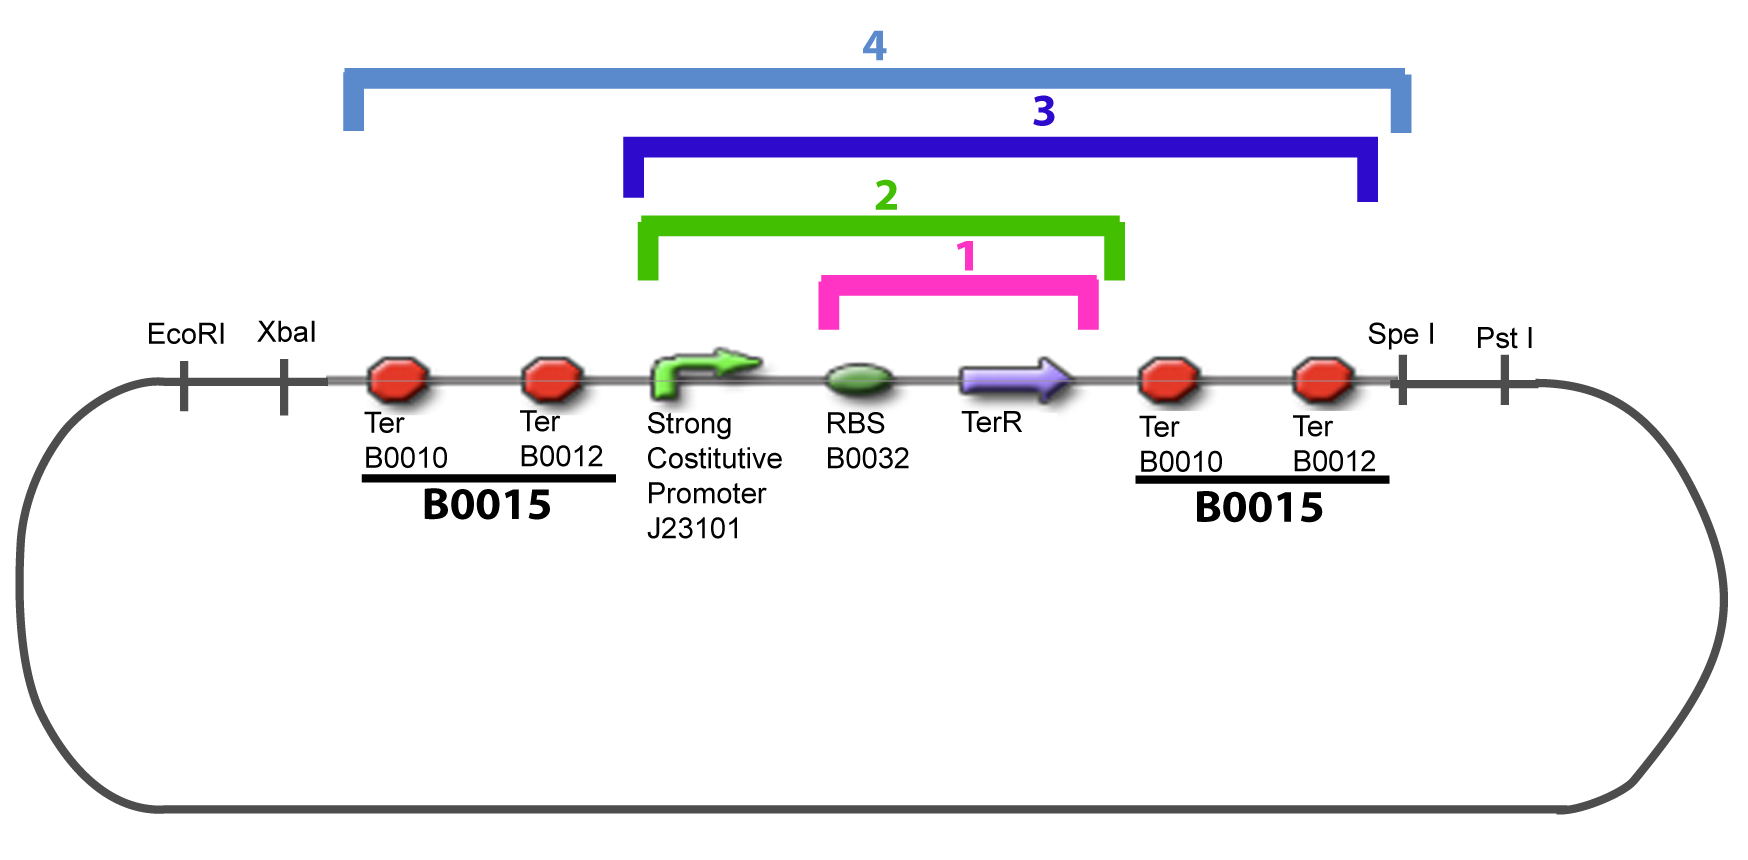
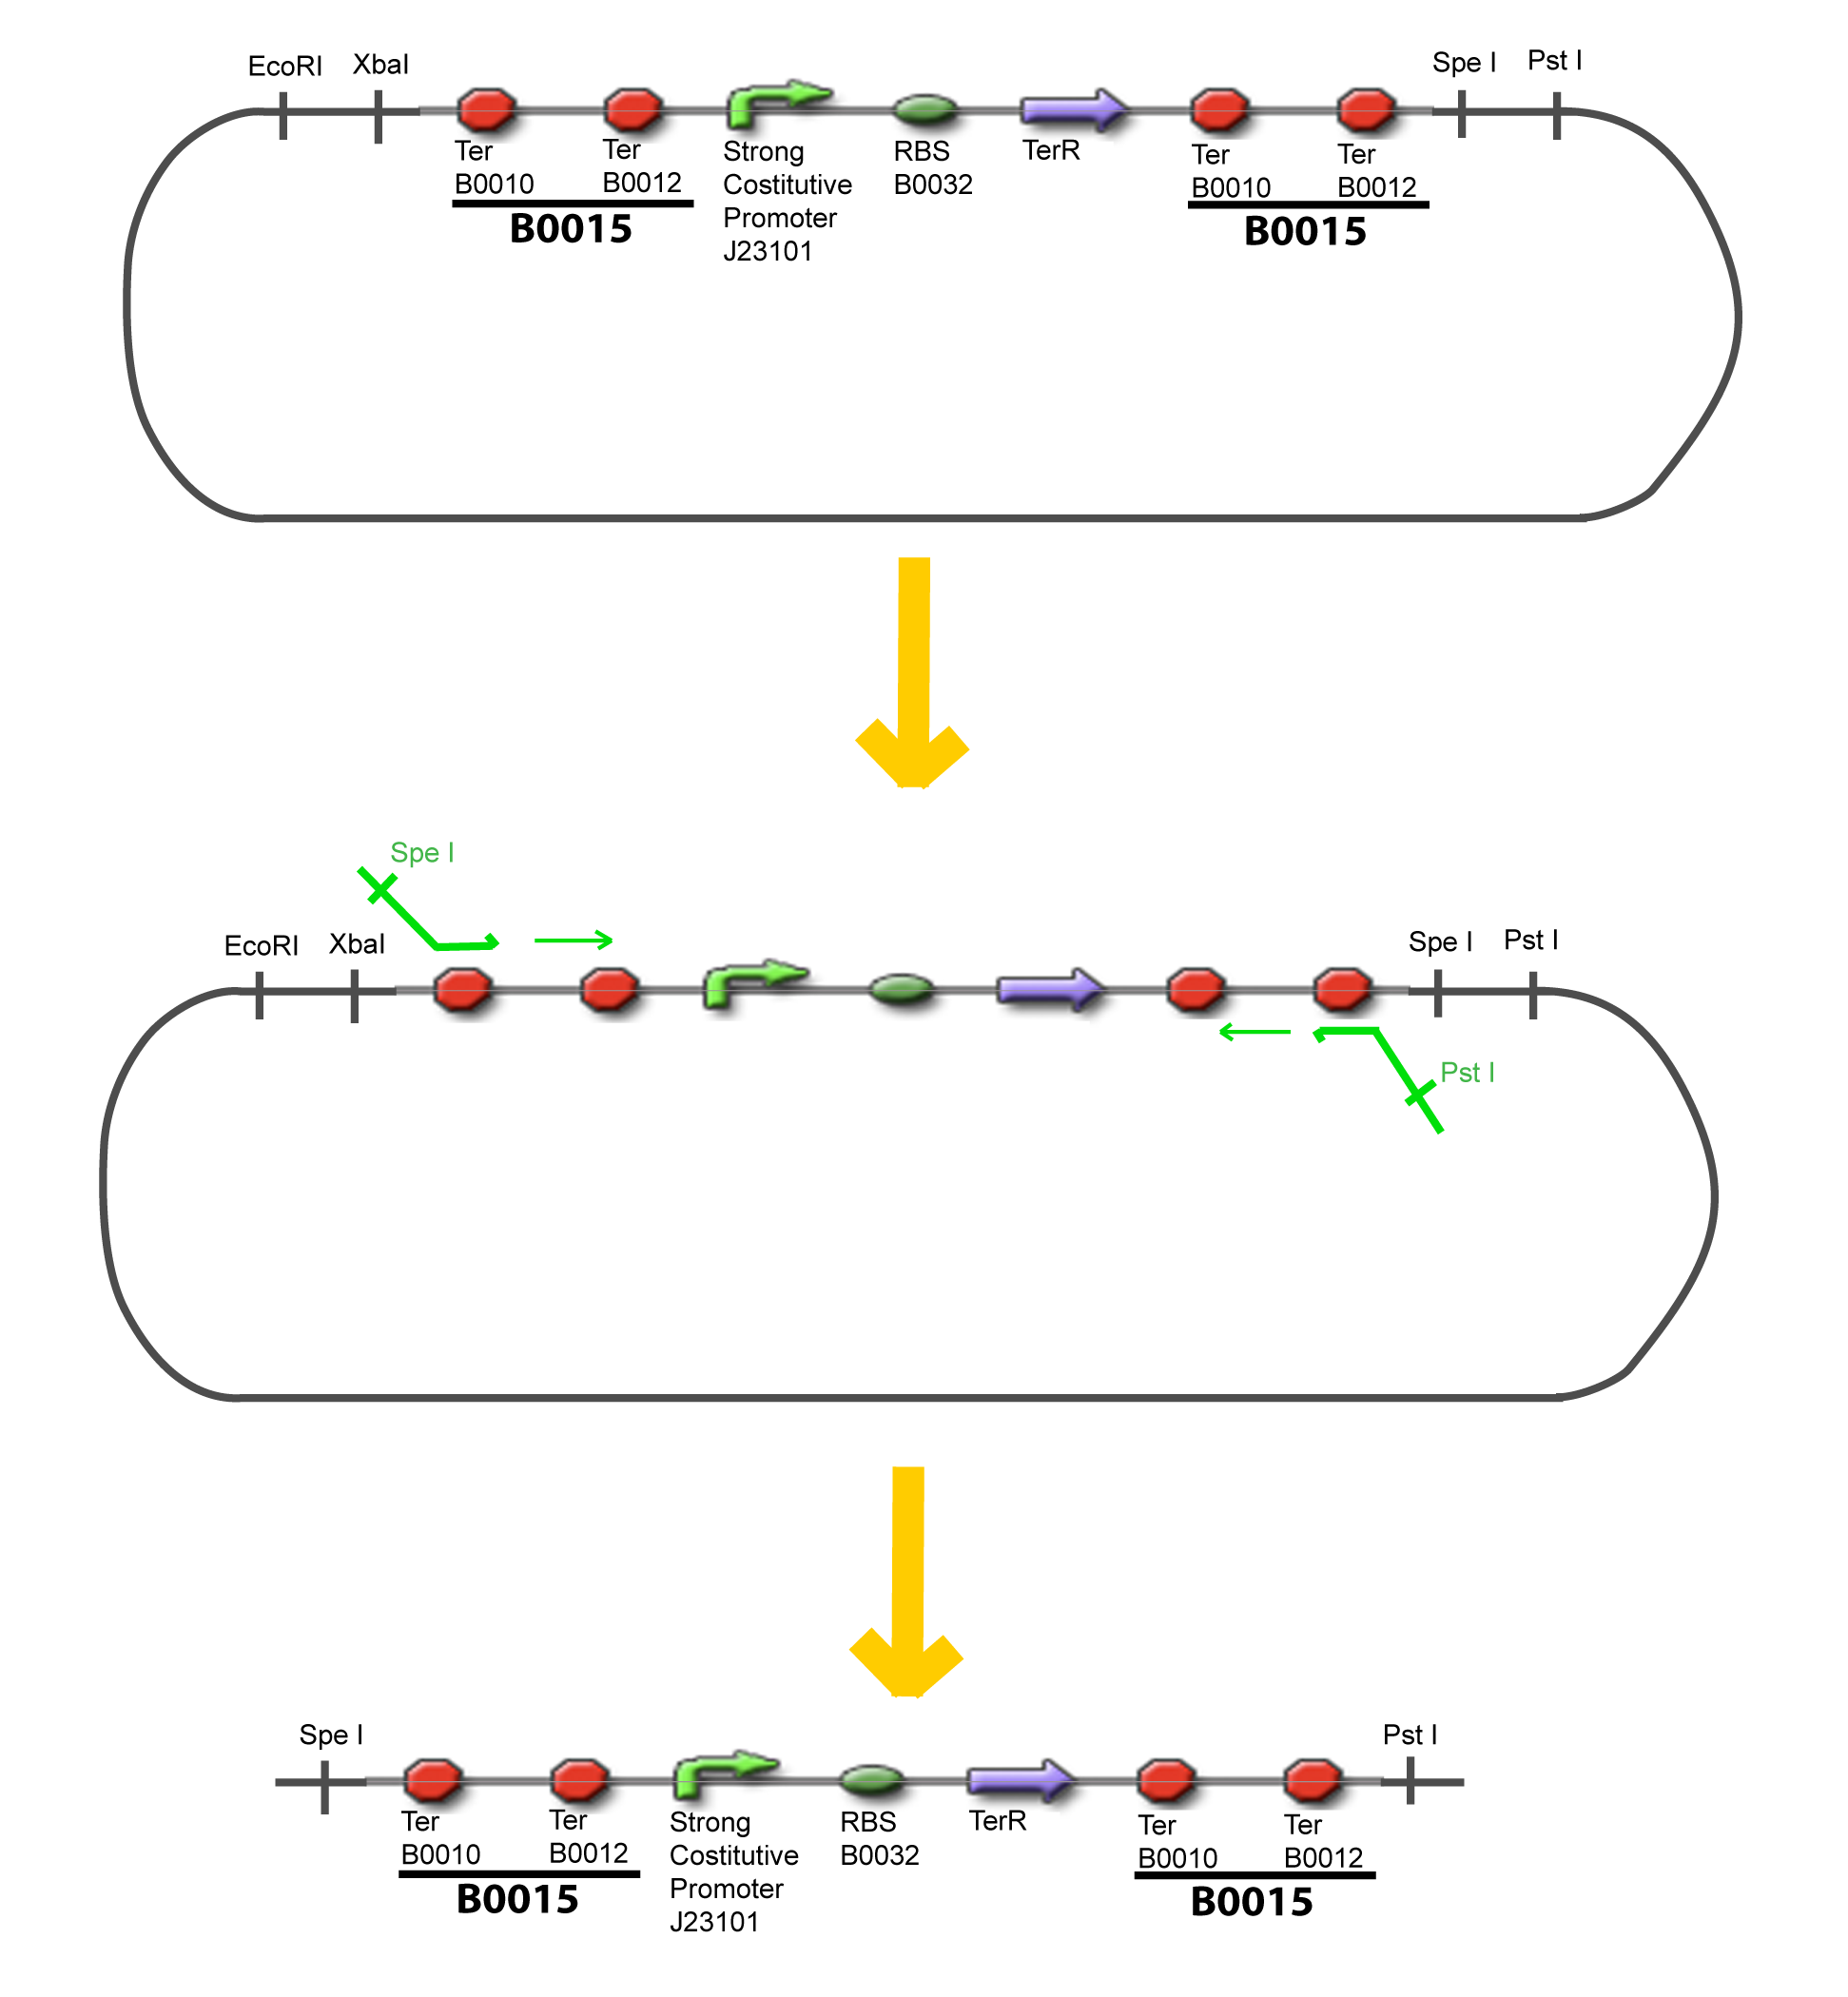
I-Principles of the ExperimentsTo evaluate quantitativly the activity of a promoter in function of its transcription factors, we need data in which the different values of the activities are correlated with various known and controlled values of the transcription factors concentrations. Therefore, we designed a generic plasmid in which the transcription factors are put under the control of previously characterized inducible promoter, and the studied promoter is put before a fluorescent reporter gene. In order to allow the study of the influence of two transcription factors over the tested pormoter, we chose to put the tested genes under two different inducible systems . One is the pBAD-AraC system. The second one is an indirect system were the gene is after the Tet inducible promoter « pTet ». The TetR gene would be expressed constitutively and at high rate thanks to a strong promoter (J23101) and its influence over the pTet promoter would be regulated by the concentration of the aTc molecule. That way the production of the tested gene can also be regulated. The J23101 and the pTet have been previously characterized. Here we show the design of two plasmids : one to test the influence of one gene and the other to test the influence of two genes over the tested promoter. II-Plasmid for promoter characterizationII-A-For study with one Transcription Factor
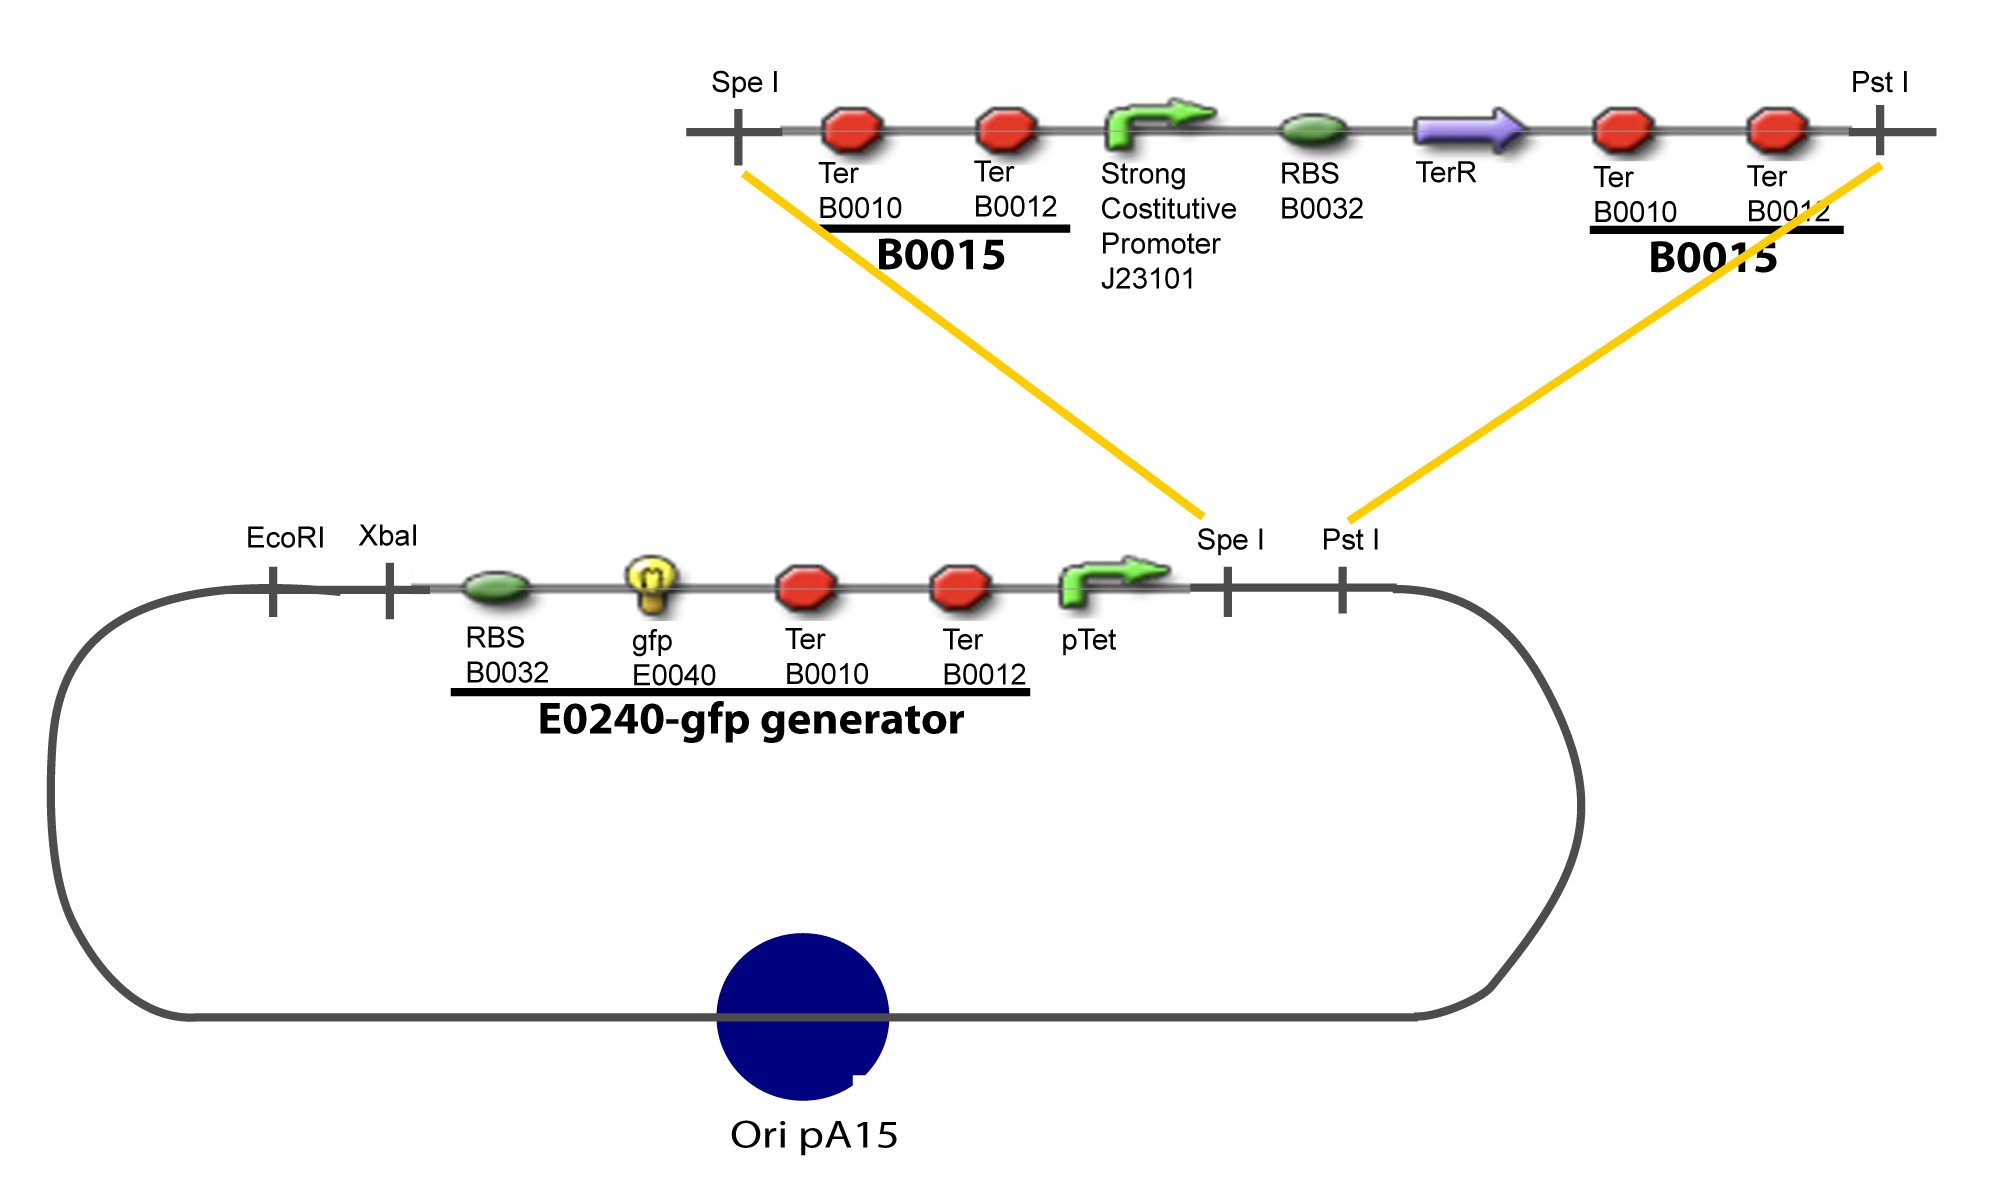
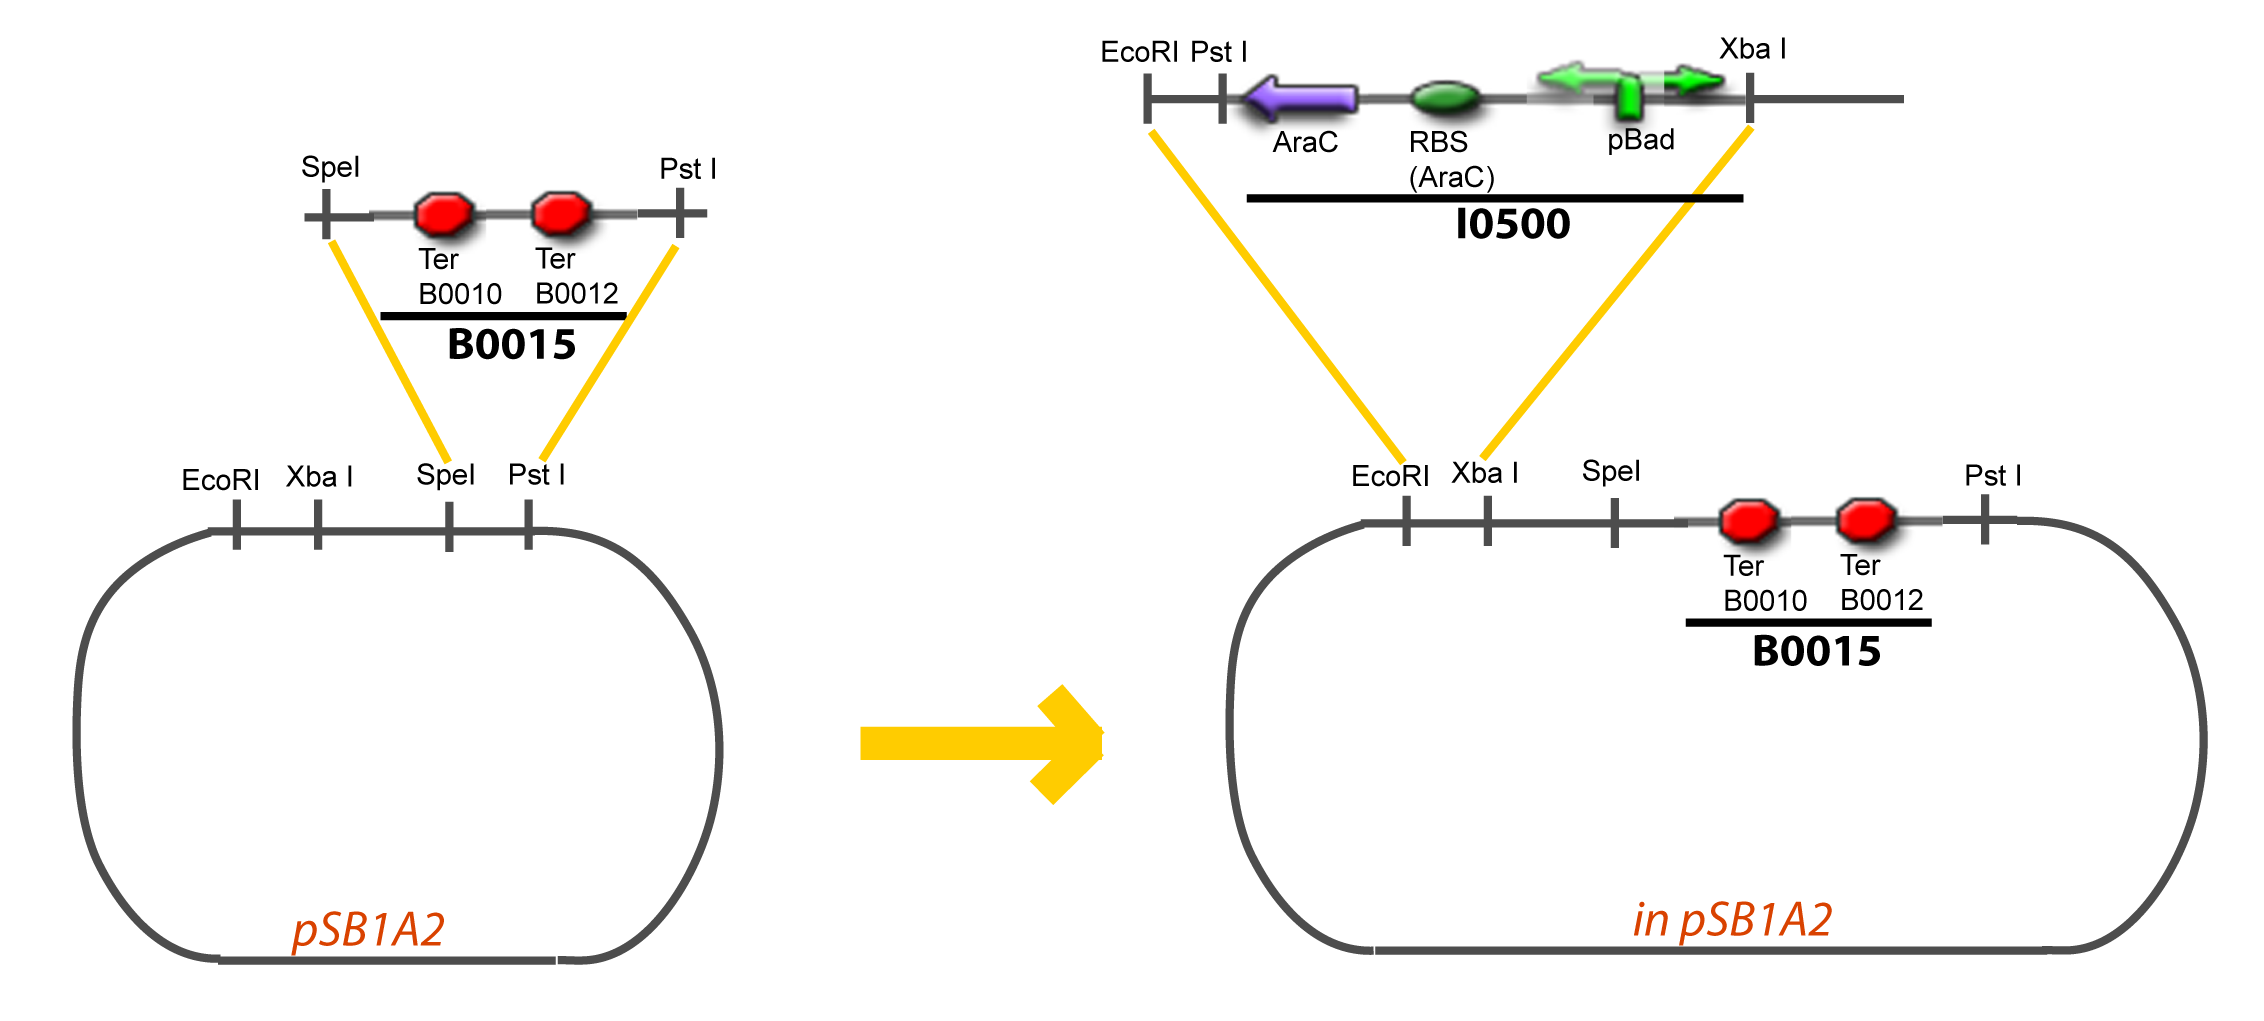
II-B-For study with two Transcription FactorIII-Molecular design for Promoter Characterization PlasmidOur aim is to make this plasmid useful not only for our project but for the whole iGEM comunity. This is why we decided to keep the Biobrick spirit as much as we could, making the plasmid compatible with the parts, so the teams using it need only the four traditional enzymes: EcoRI, XbaI, SpeI and PstI.We wanted also to make optional the introduction of a second tested gene. The strategy is then based in two plasmids. The principal plasmid contains everything needed to test the effect of one gene over the tested promoter activity. The second plasmid called « Accessory plasmid » can be introduced easily in the Principal Plasmid and contains the necessary elements to add the expression of a second gene to the system. The resulting plasmids are presented below.
III-A-Principal plasmid
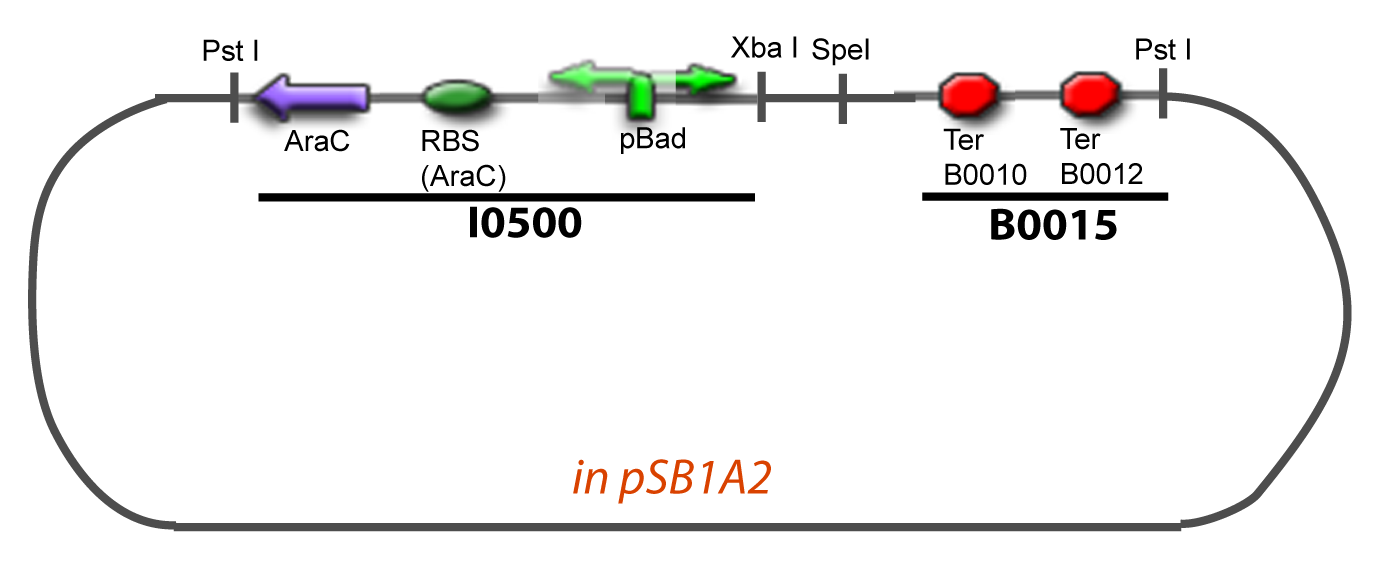
III-B-Accessory plasmidIV-Promoter and Transcription Factors insertionThe strategy to introduce the tested promoter and the tested gene(s) is very simple. The only difficulty is that the order of insertion that we describe has to be respected to avoid unwanted restriction enzyme cuts:
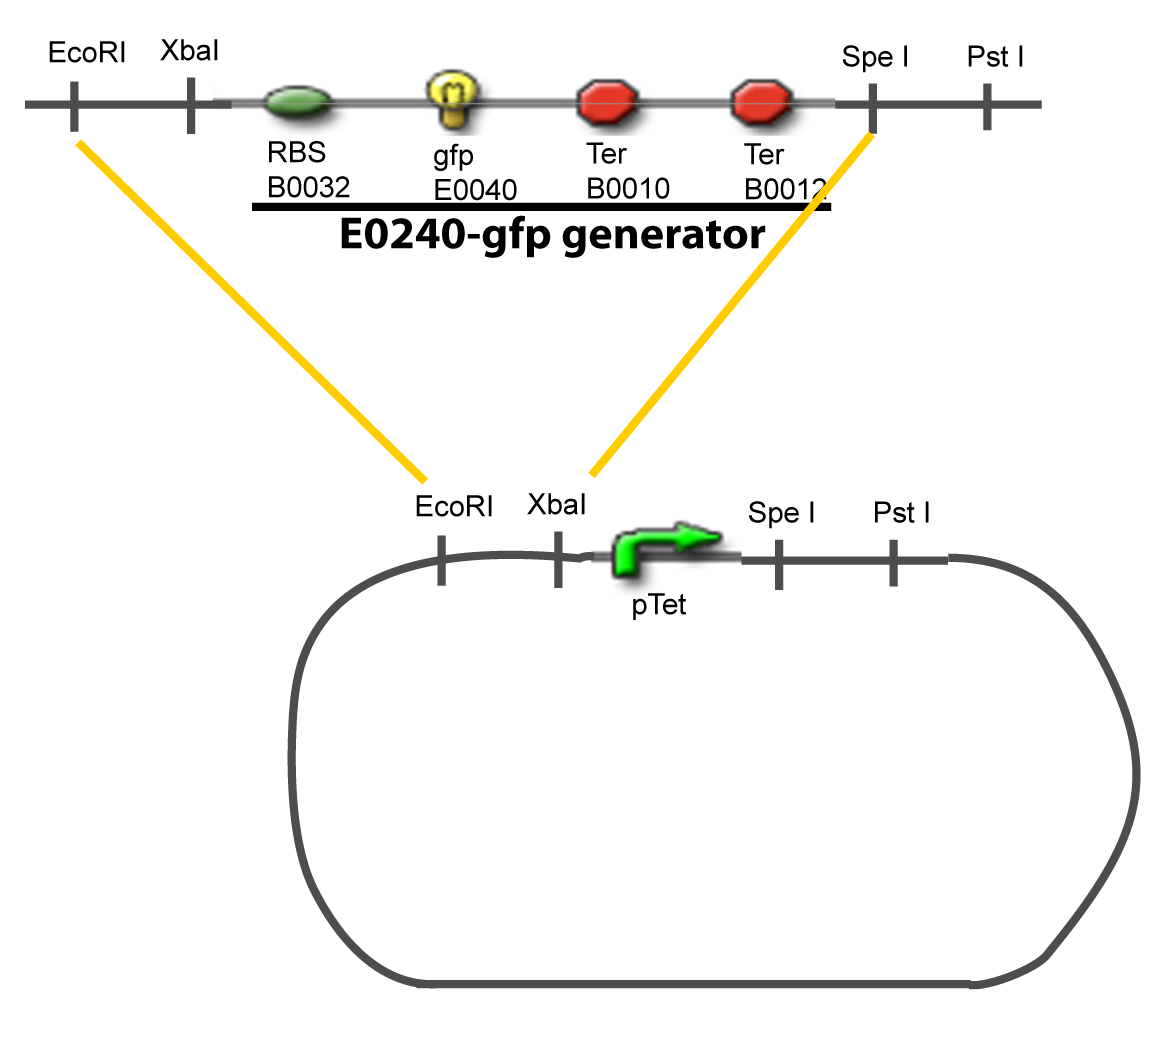
-Cut Promoter with EcoRI and SpeI -Cut Principal plasmid with EcoRI and XbaI
-Cut Gene with XbaI and SpeI -Cut Principal plasmid+Promoter with SpeI -Check the right orientation of the 1st gene by PCR with appropiated primers If wanted…
-Cut Gene with XbaI and SpeI -Cut Accessory Plasmid with XbaI and SpeI -Check the right orientation of the 2nd gene by PCR with appropiated primers4
-Cut Accessory Plasmid+2nd gene with PstI -Cut Principal plasmid+Promoter+1st gene with SpeI -Check the right orientation of the 2nd gene expression system by PCR with appropiated primers V-Resulting plasmidsV-A-For one transcription factor effect
V-B-For two transcription factors effectVI-Protocole for plasmid constructionWe show here our plan to make these plasmids at the experimental level. VI-A-Principal Plasmid constructionWe devided the Principal Plasmid in two main blocks to go faster: VI-A-1-BlocksVI-A-2-Block 1 constructionthe result... VI-A-3-Block 2 constructionBiobrick assembly steps:
VI-A-4-Two-block assemblyVI-B-Accessory plasmid constructionAddition of restriction sites to B0015 by PCR: Addition of restriction sites to pBAD-AraC by PCR: Assembly: Assumptions Specific to the ExperimentsThe previous experiment is used to find parameters regarding to our modelization. However, the experiments themselves must be described in the same way to involve those parameters in a consistent way, and actually, to be interpreted.
|
 "
"


